Admin App v1.7 for ODS / API v3.3
Before You Install
This section provides general information you should review before installing the Ed-Fi ODS / API Admin App.
Prerequisites
The following are required to install the Admin App:
- The Admin App provides an interface to administer an Ed-Fi ODS / API. Understandably, you must have an Ed-Fi ODS / API deployed and operational before you can use the Admin App. The ODS / API must be an On-Premises Installation either via Windows Installers for the Ed-Fi ODS/API (Suite 3) or manual installation via source code.
- You must have an Ed-Fi license to use the Admin App. If you have an installation of the ODS / API, you already have a license. The Ed-Fi License is free and available online. If you haven't done so already, visit the Ed-Fi.org licensing section for details and a link to get started.
- Admin App authentication will work via Single Sign-On using either Active Directory or Active Directory for Azure depending on deployment.
- Download and install the Microsoft IIS URL Rewrite Tool: https://www.iis.net/downloads/microsoft/url-rewrite if it is not already available (this may require computer restart).
- A modern web browser such as Google Chrome, Mozilla Firefox, or Microsoft Edge. Internet Explorer 11 (a pre-installed browser on Windows Server) may load, but not function when using Admin App.
Required Information
You will need the following information to complete this installation:
- The location of your Ed-Fi ODS / API.
- Administrator access and credentials for either on-premises or Azure environment with target Ed-Fi ODS / API.
Installation Instructions
This section provides step-by-step instructions for installation. The specific steps are different depending on the deployment model and version of your Ed-Fi ODS / API.
Compatibility & Supported ODS / API Versions
Currently, the ODS / API Admin App can be installed for use with the Ed-Fi ODS / API v3.3. See the Ed-Fi Technology Suite Supported Versions for more details.
On-Premises Deployment for ODS / API for v3.3
Each step is outlined in detail below.
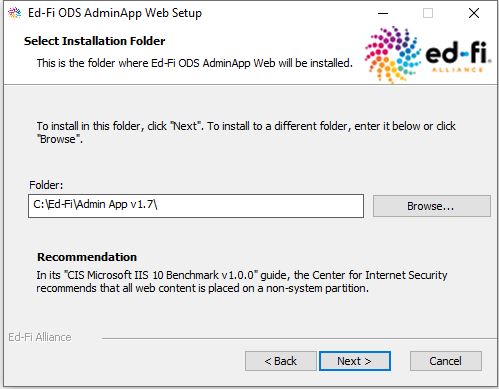
Step 1. Select Install Location
Select an installation location.
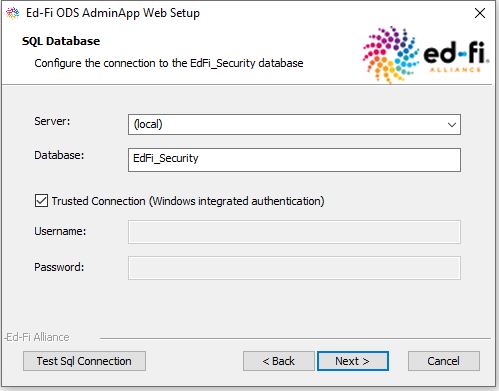
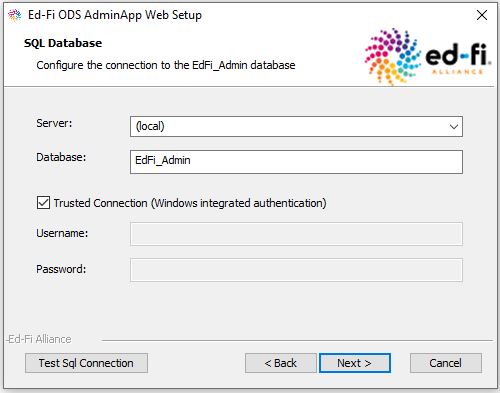
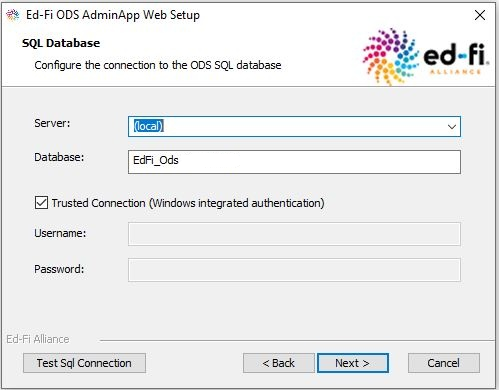
Step 2. Configure SQL Connection
Next, we'll set up a SQL connection to your local test server for Ods, Security, and Admin databases.
For local testing, use the following values:
- Server: (local) for testing.
- Authentication: Trusted Connection.
We strongly recommend you test that the credentials are correct by clicking Test Sql Connection on each database configuration page.
Ods database connection:
Enter appropriate Ods database name if it is different (ex: EdFi_Ods).
Security database connection:
Admin database connection:
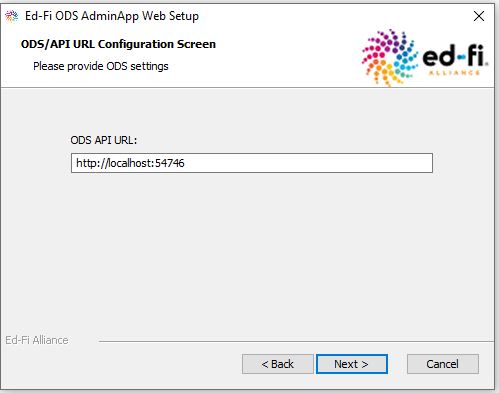
Step 3. ODS / API URL Configuration
At this point, we'll connect to the ODS / API:
For testing against a local ODS / API, use http://localhost:54746 ( default value for ODS API local developer installation).
Step 4. ODS / API Mode
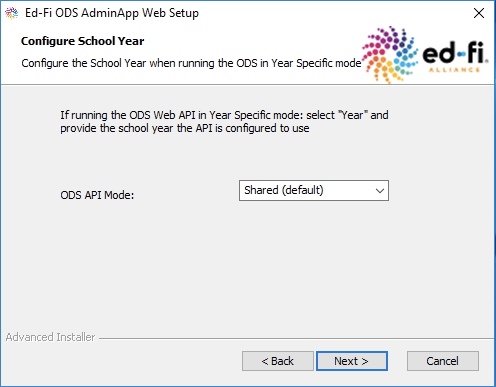
Next, choose which mode the ODS / API is running under. If the ODS was installed and left in default mode: select "Shared (default)".
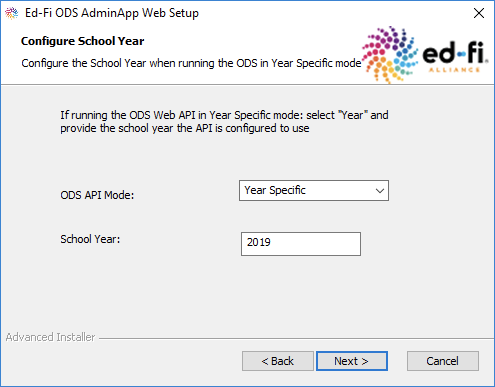
If the ODS / API was configured after installation to run in Year Specific mode: select "Year Specific" and provide the configured school year:
For additional information about Year Specific mode and configuring the Admin App or ODS without use of the exe installers, see https://edfi.atlassian.net/wiki/spaces/ODSAPI32/pages/27099724 and Year-Specific Mode (v1.x).
Step 5. Create SQL Server Login (if "Trusted Connection" used above)
This step only needs to be completed if you selected Trusted Connection option on any of the database configuration pages in Step 2. If you did not, please move on to Step 6.
Now that the installation has finished, follow these steps to create a new SQL Server login for the EdFi.AdminApp App Pool:
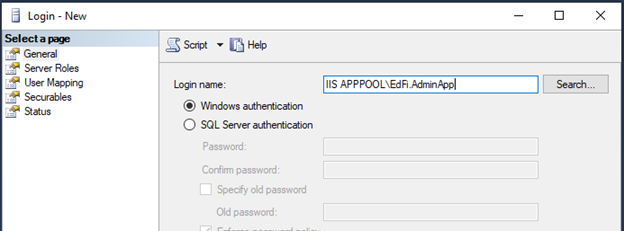
- Open SQL Server Management Studio and at the server-level, expand the "Security" folder, right-click "Logins", and then select "New Login...".
- For the Login Name, enter "IIS APPPOOL\EdFi.AdminApp".
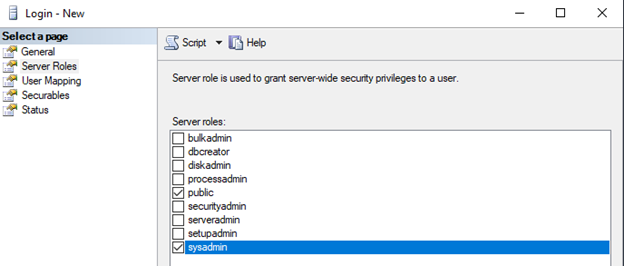
- On the left side of the pop-up window, select the "Server Roles" tab and ensure the "sysadmin" checkbox is checked.
- Everything else can be left as default. Once that is done, hit OK.
Step 6. Checking Folder Permission (Optional)
Folders to verify:
- Admin App application folder (Default folder path: C:\Ed-Fi\Admin App v1.7)
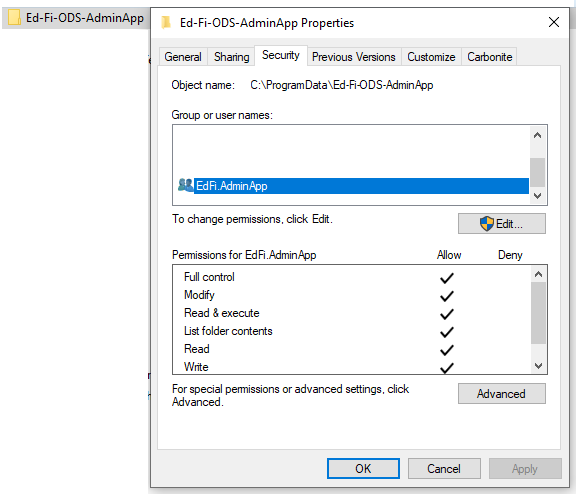
- Admin App log folder (Default folder path: C:\ProgramData\Ed-Fi-ODS-AdminApp)
For checking permission – right-click the folder then choose Properties, select Security tab to verify the "Group or user names" section has EdFi.AdminApp with full control.
Step 7. Securing the Admin App
If you're performing a production on-premises installation, now would be a good time to review the documentation on Securing the Admin App, particularly the material on IIS configuration and NTLM.
Step 8. Admin App Licensing & Configuration
This section provides an overview of the initial Admin App configuration. We'll continue using a local test environment.
Connect to the Admin App URL https://localhost/AdminApp to complete the setup.
If you are using Microsoft Edge you may see an active directory security authentication window.
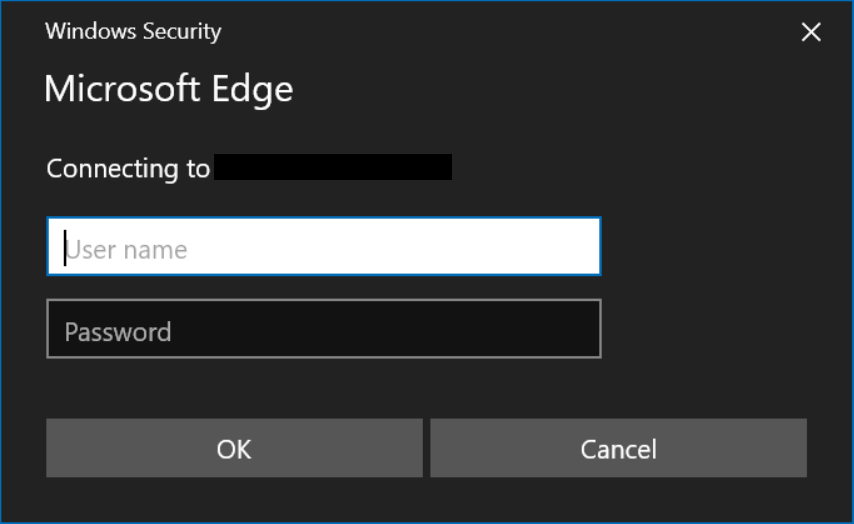
Go ahead and sign in.
You'll see the following screen. To complete the additional setup process, press Continue.

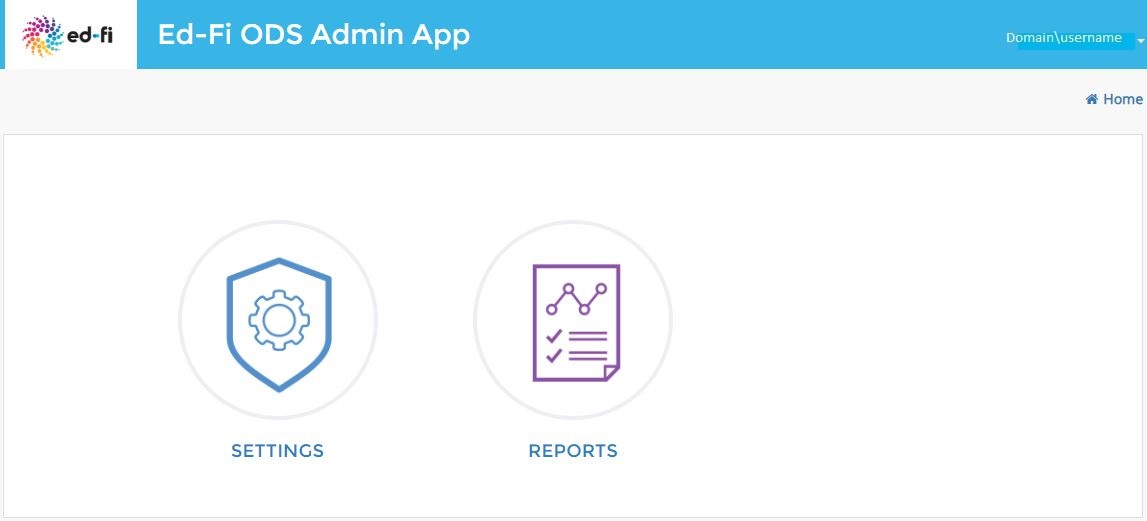
You should land on the Admin App Home page.
Step 9. Restart the ODS / API
To finish the Admin App on-premises setup the ODS / API must be restarted.
Steps for restarting the ODS / API:
- Open IIS Manager (inetmgr)
- In the Connections pane on the left, expand Sites and locate the Ed-Fi website
- Right-click the website and select Manage Website > Restart
- Close the IIS Manager (inetmgr)
Step 10. Admin app walk through
Step 10.1 Add Vendor & Application
In this step, we'll add a new vendor and a client application.
If you're not already there, go to the Admin App Home page:
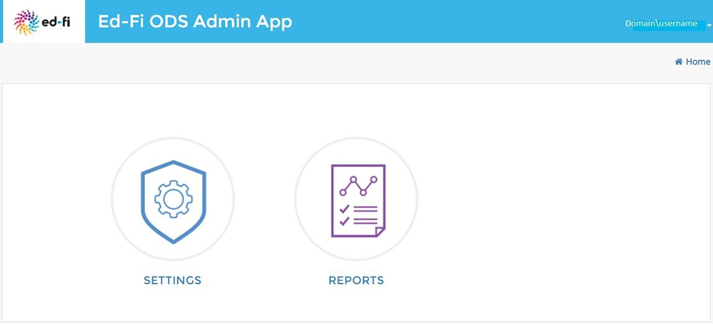
Click Settings and you'll be presented with the screen below. We'll use this screen to add a vendor.
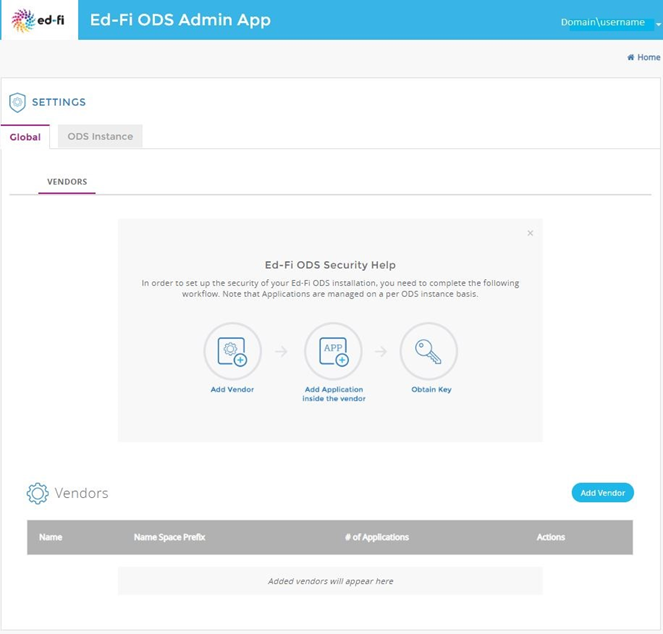
Clicking on Add Vendor will open the following screen for adding a new vendor.
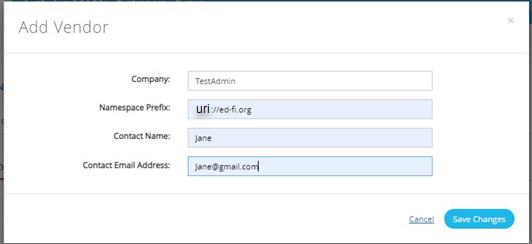
Please enter company, namespace, contact name and contact e-mail address and hit Save Changes.
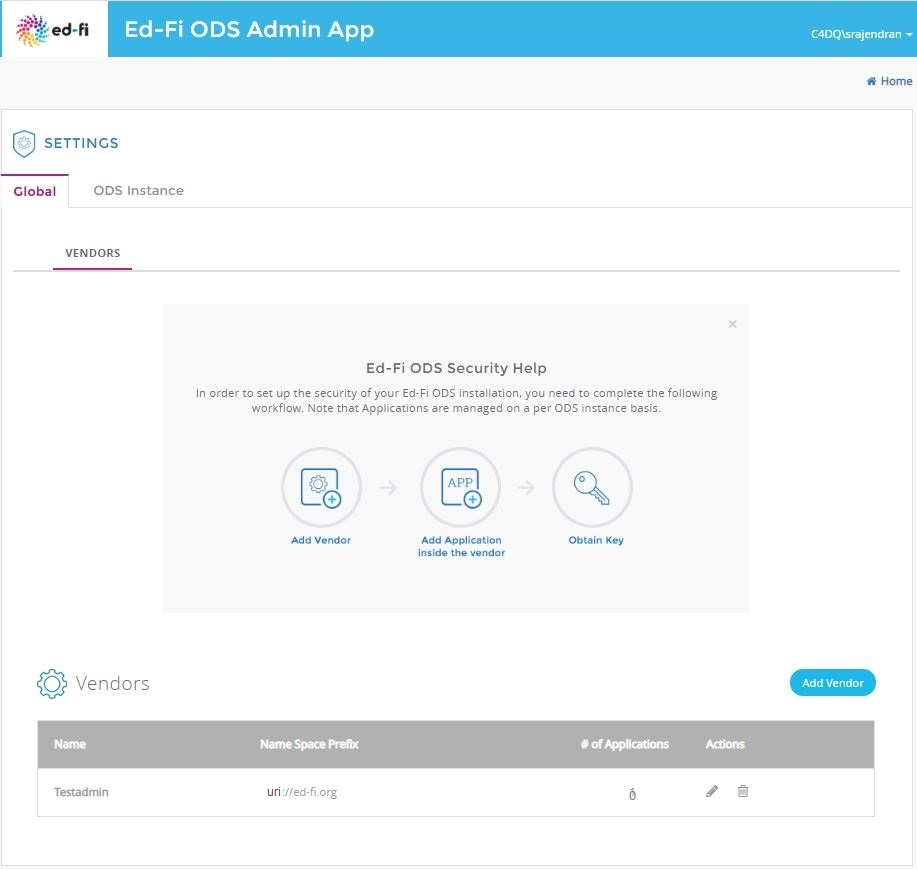
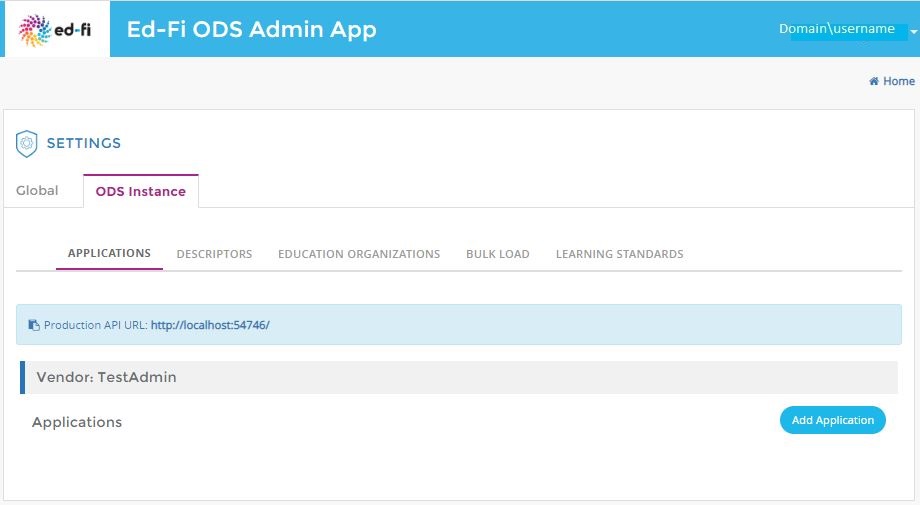
Now, we'll add an application to the vendor we just created. Applications are specific to an ODS / API instance.
Click on the ODS Instance tab to go through the step below.
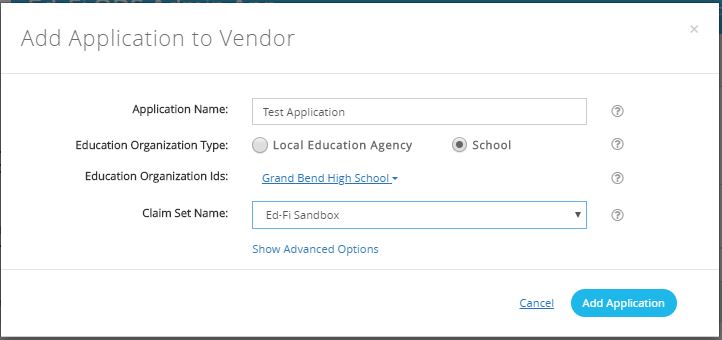
Clicking on Add Application will show following screen.
Steps for adding application to vendor
- Provide application name
- Select either option for education organization type
- Choose any available education organization ID from the drop-down menu
- Select appropriate claim set name
- Click Add Application to save the application
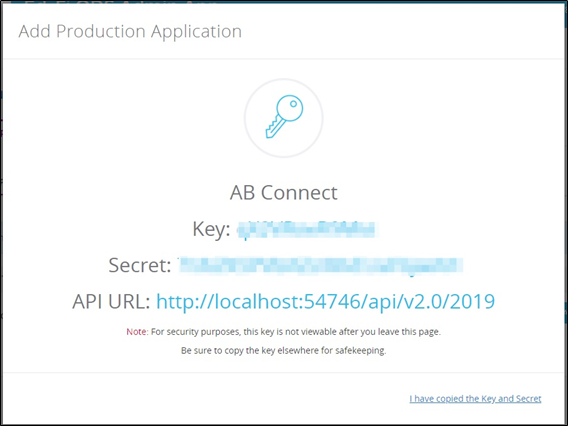
You will be presented with the key and secret at the next screen. Copy this information to a safe place.
It's useful to test client system functionality (in this document we will be using the generated key and secret for Bulk upload process).
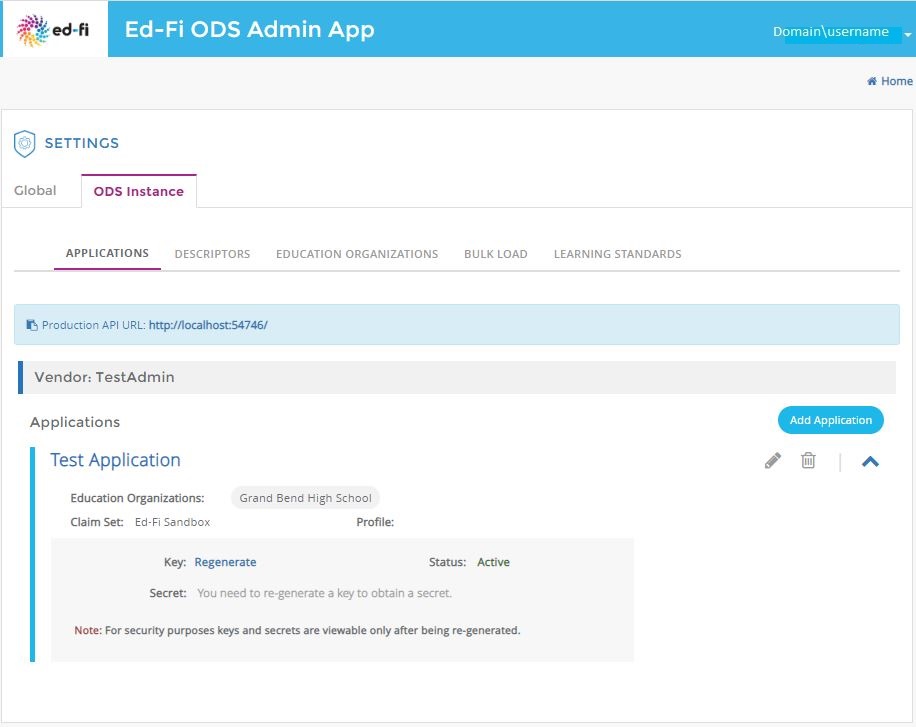
After completing the above step, you'll see the new Test application you just added.
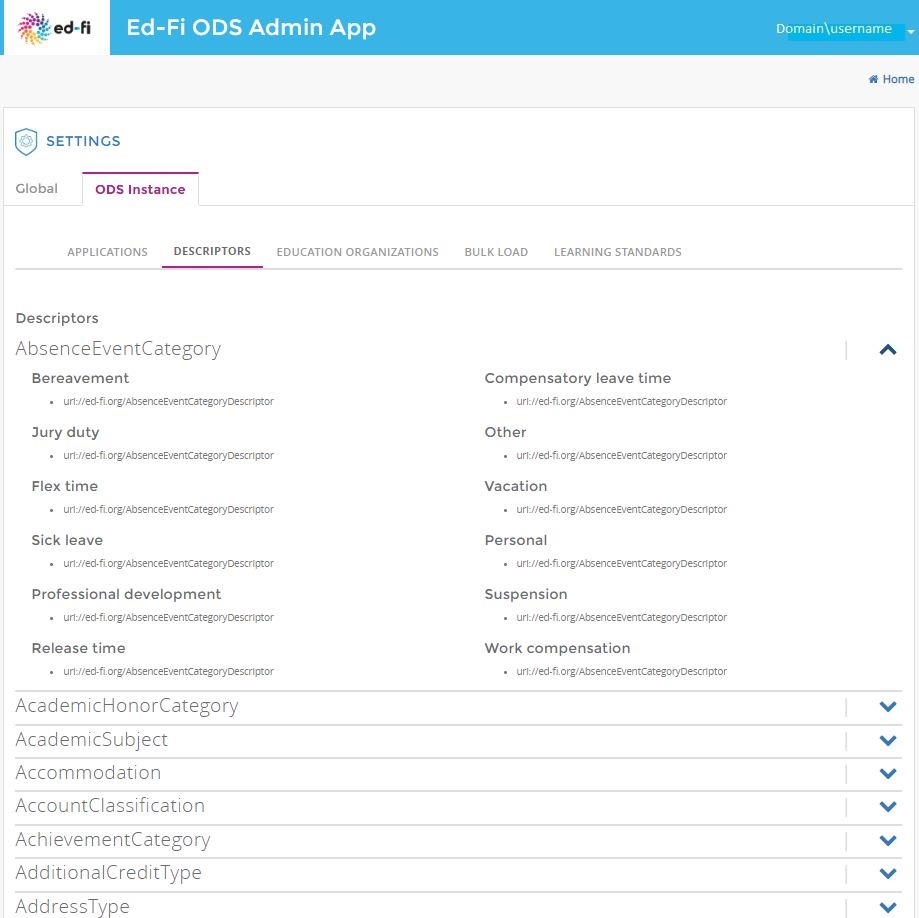
Step 10.2 Descriptors tab
View configured descriptors for a known instance.
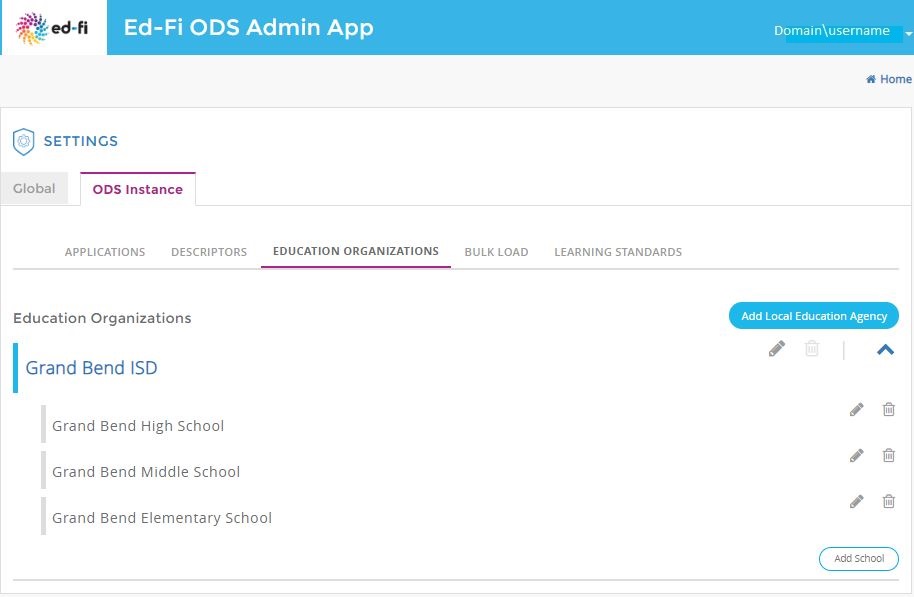
Step 10.3 Education Organizations tab
View and manage education organizations (LEAs and schools).
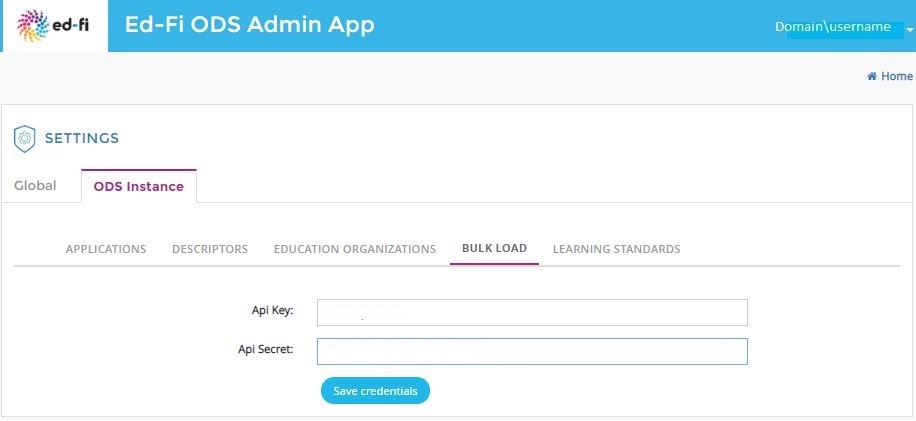
Step 10.4 Bulk Upload process
Please enter generated key and secret (on step 10.1) here and save credentials. Saved key and secret will be used to authorize the bulk upload process.
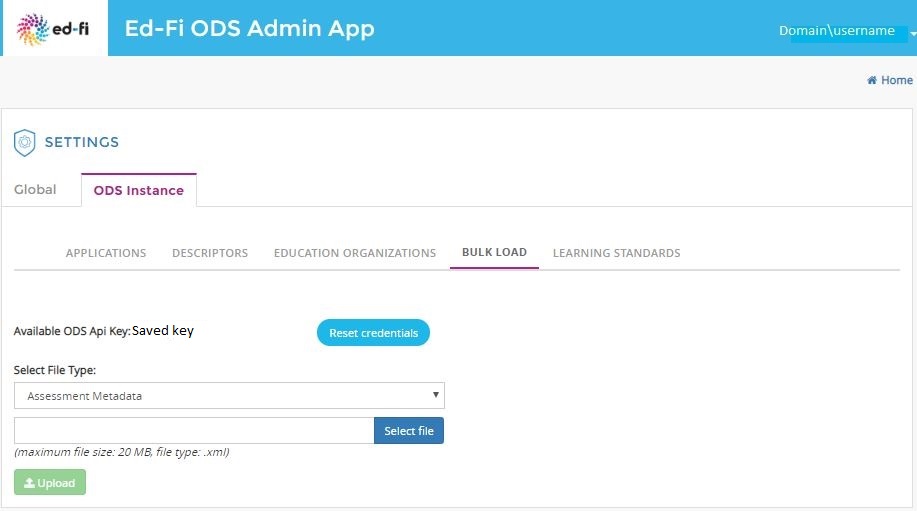
After saving credentials, bulk upload page will be presented.
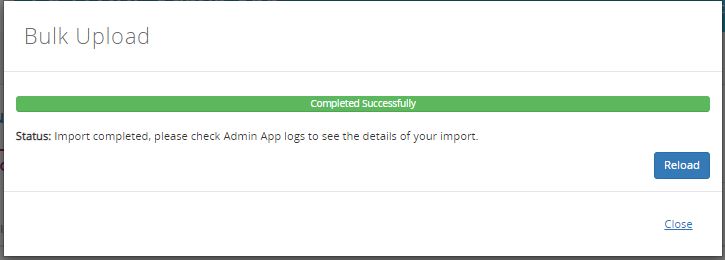
To perform upload, please select appropriate file type and input file and click upload. After clicking the upload button, the popup will display the upload progress.
Bulk upload is completed successfully.
Step 10.5 Sync Learning Standards
In this step, we'll populate learning standards in the ODS / API by using the Admin App to synchronize with the AB Connect API.
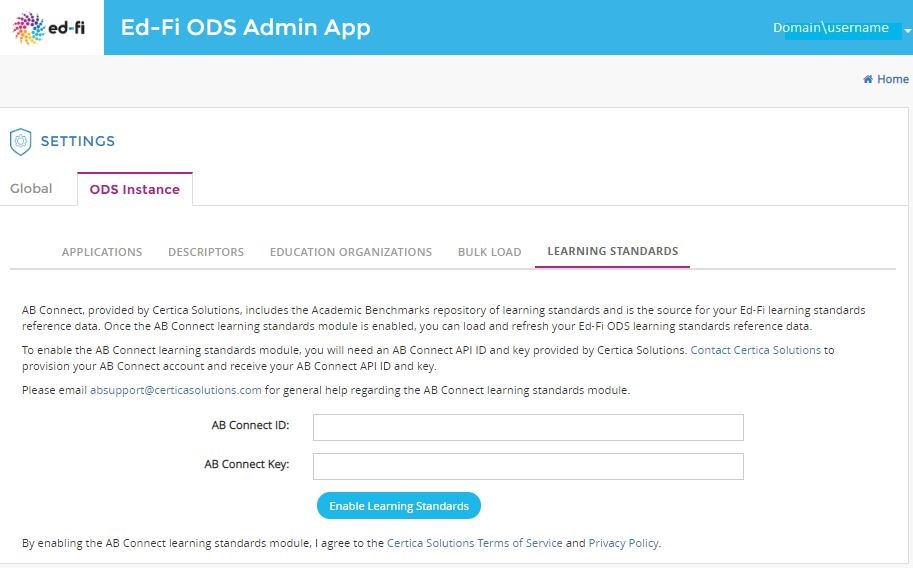
To synchronize learning standards in on local environment, select the Learning Standards tab. You'll be presented with the screen below:
The screen contains instructions on how to get an API ID and Key from Certica Solutions. Following the instructions on screen to obtain an ID and Key.
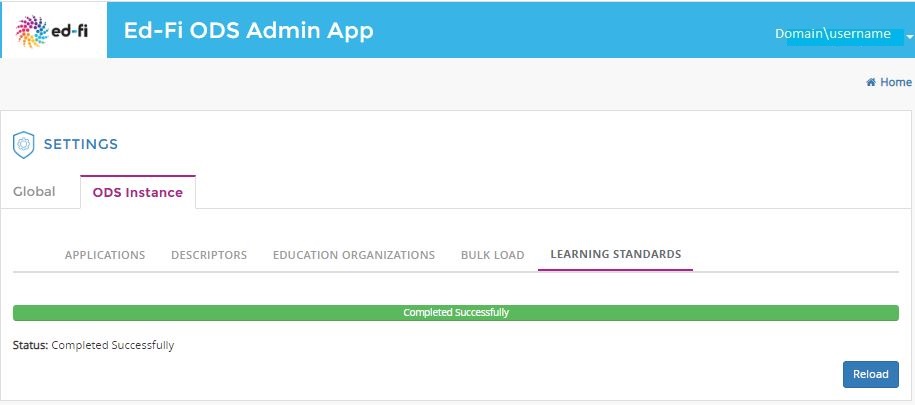
Please enter AB connect ID and Key obtained from Certica and click Enable Learning Standards. Syncing will begin. A progress bar will show you the current status, and you'll see a "completed successfully" message once done.
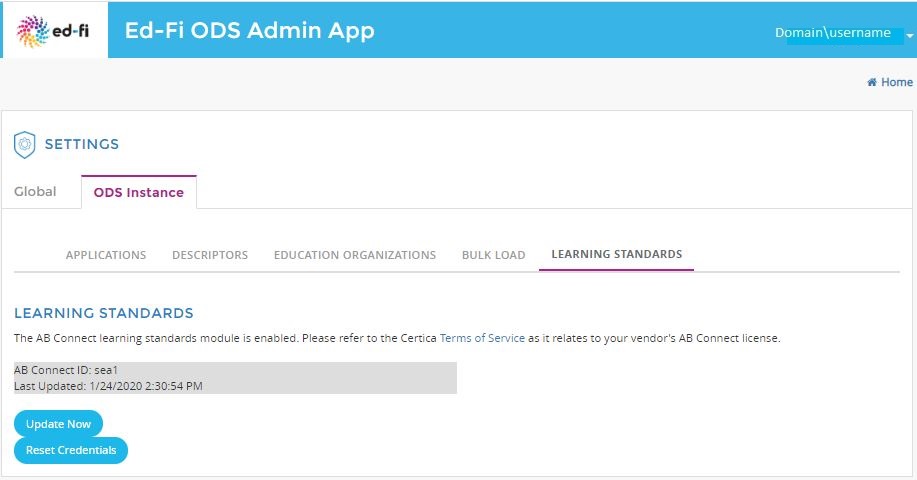
Clicking Reload will take you to the following screen, where you can reset the AB connect credentials or update the learning standards.
Optional Verification Step
To confirm that learning standards have been populated, a SQL query, such as shown below, can be run against your ODS / API instance database. The query should return a count in the thousands from a successful learning standards synchronization:
SELECT COUNT(*) FROM EdFi.LearningStandard WHERE [Namespace] LIKE '%api.academicbenchmarks%';
Step 11. Reports
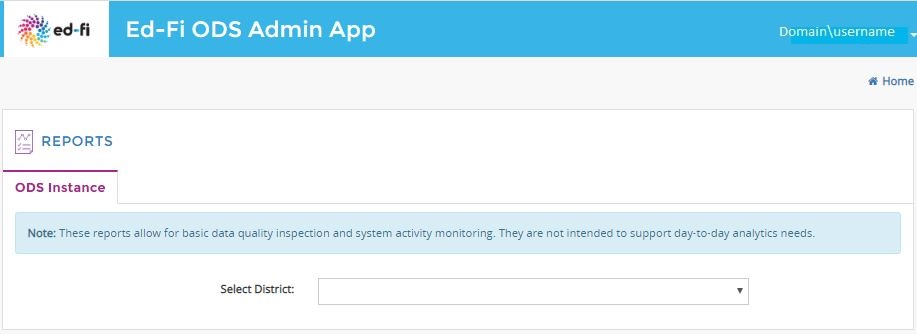
Clicking the Reports on Home screen, will take you to the Ods Instance Reports.
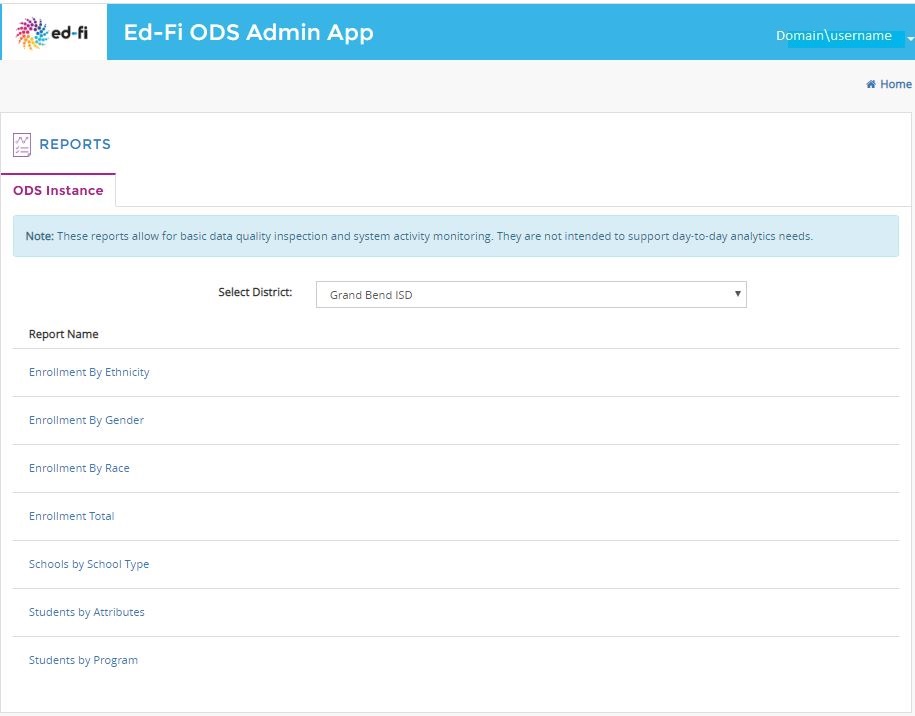
Choosing district will provide district specific reports.
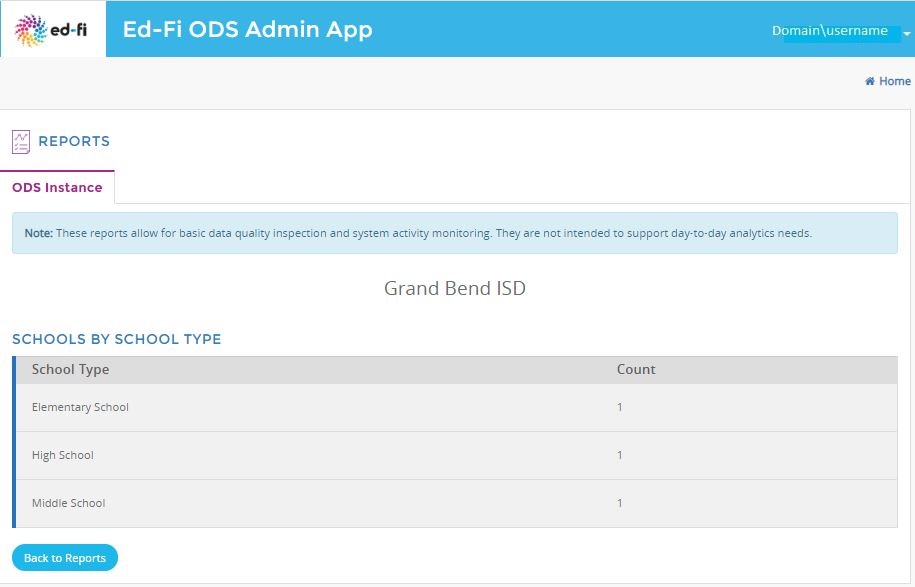
By clicking on the individual report link will take you to the detailed report page.
