Next Steps
This section outlines a few recommended next steps following a successful installation:
Explore Admin App Features
After installation, consider exploring the Admin App itself:
- Review and edit education organizations. This allows you to set up district and school information specific to your organization. If you installed the Admin App for a new, empty ODS / API, this provides you with an easy setup. If your Admin App is pointing to an existing ODS / API, you can confirm that the education organization information is as you expect.
- Review Ed-Fi Descriptors. Ed-Fi Technology Suite allows you to configure value lists (i.e., code sets) specific to your context using Ed-Fi Descriptors. You can review Descriptors in the Admin App to make sure the as-shipped ODS / API contains values appropriate for your environment.
- Add client systems. Data moves in and out of the ODS / API from client systems such as a student information system, assessment system, rostering system, and so forth. If your Admin App is connected to a new instance of the ODS / API, you'll need to set up client systems and provide those system administrators with credentials to get data into your new ODS / API. If your Admin App is connected to an existing instance, you can verify that the vendors and applications are set up as you expect.
- Add learning standards. The Ed-Fi Alliance and Instructure partnered to offer the Academic Benchmarks system of learning standards mappings available through the Ed-Fi Operational Data Store (Ed-Fi ODS/API). This partnership will make Academic Benchmarks’ digitized learning standards readily available to education agencies and vendors. The Admin App has built-in synchronization to populate an ODS / API directly from Instructure AB. The license is free, and can be obtained online by visiting this link.
Admin App Walkthrough
Below is a quick start guide and walk through of Admin App's important features.
Add Vendor & Application
In this step, we'll add a new vendor and a client application.
If you're not already there, go to the Admin App Home page:
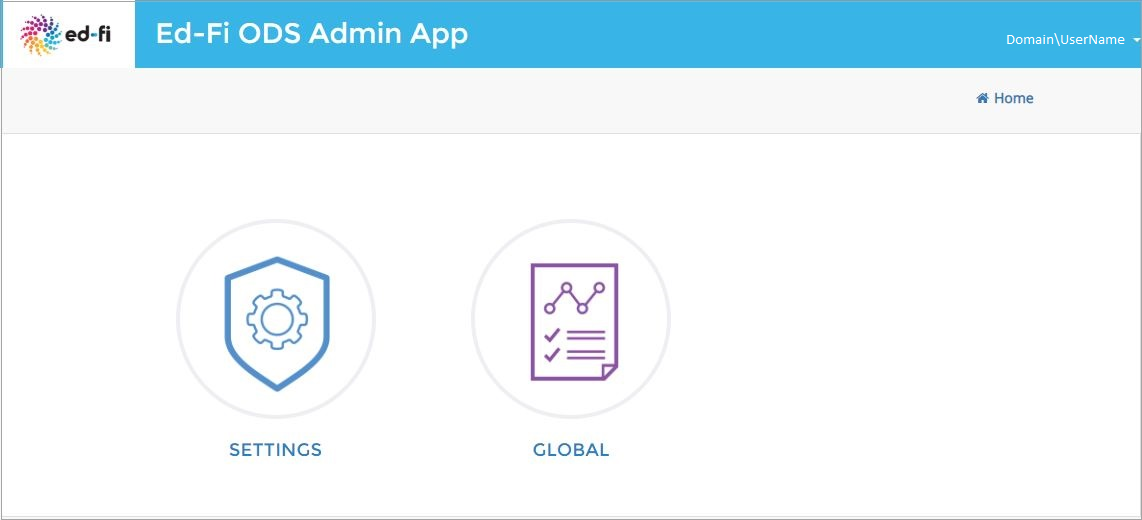
Click Global and you'll be presented with the screen below with two tabs: Vendors and Claim Sets.
Details for the Claim Sets tab can be found here: https://edfi.atlassian.net/wiki/spaces/ADMIN/pages/25238340.
We'll continue with the Vendor tab to add a vendor.
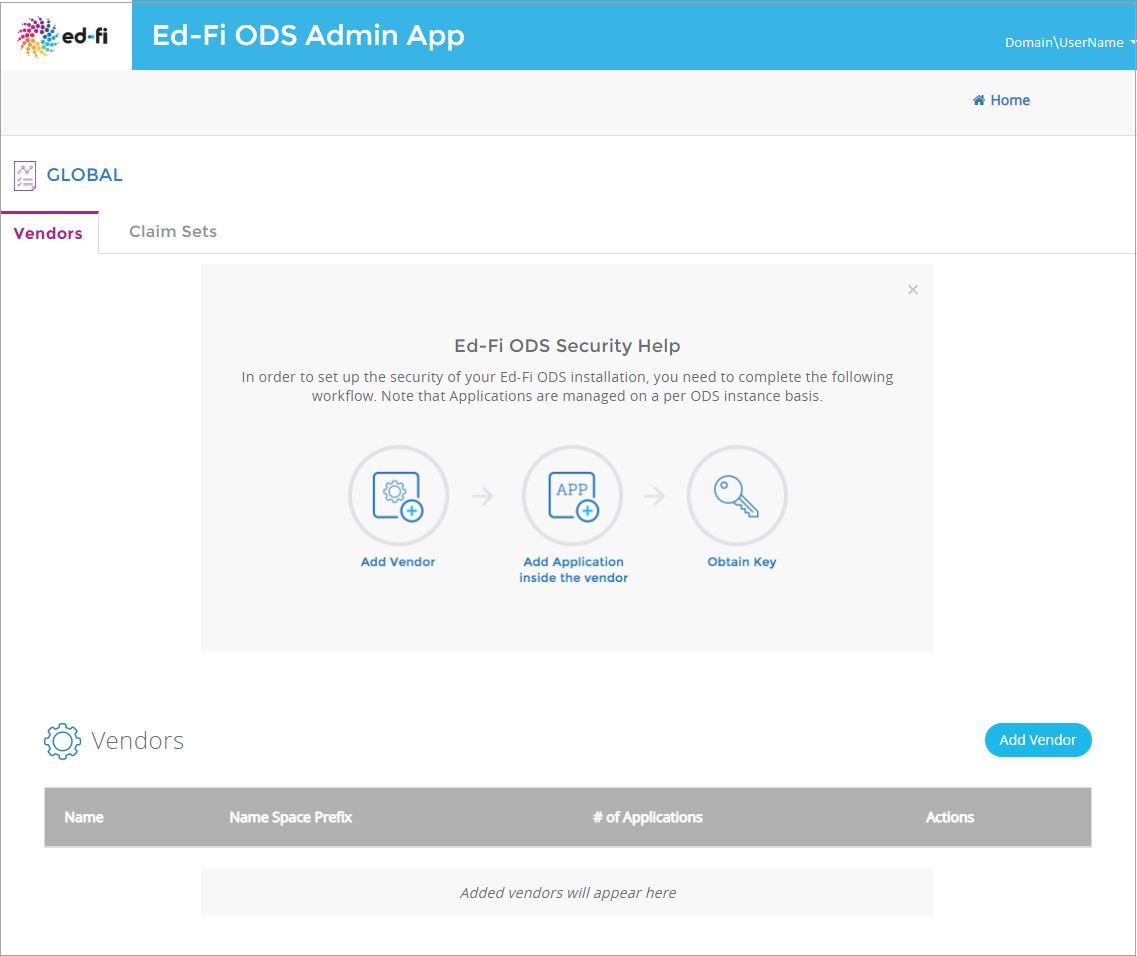
Clicking on Add Vendor will open the following screen for adding a new vendor.
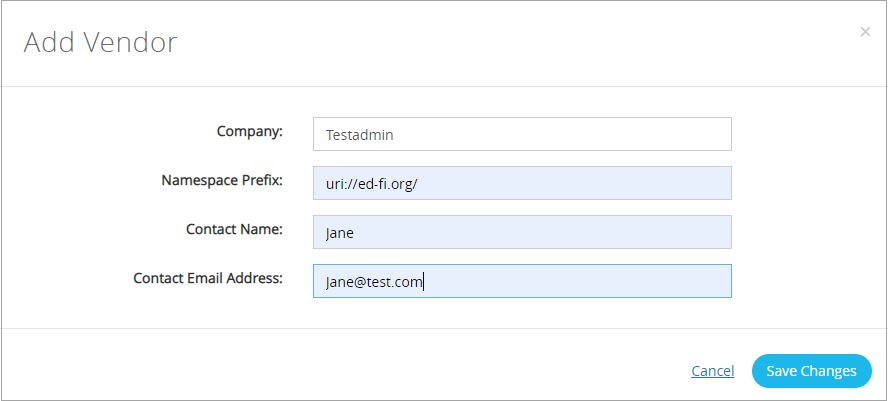
Please enter company, namespace, contact name, and contact e-mail address and hit Save Changes.
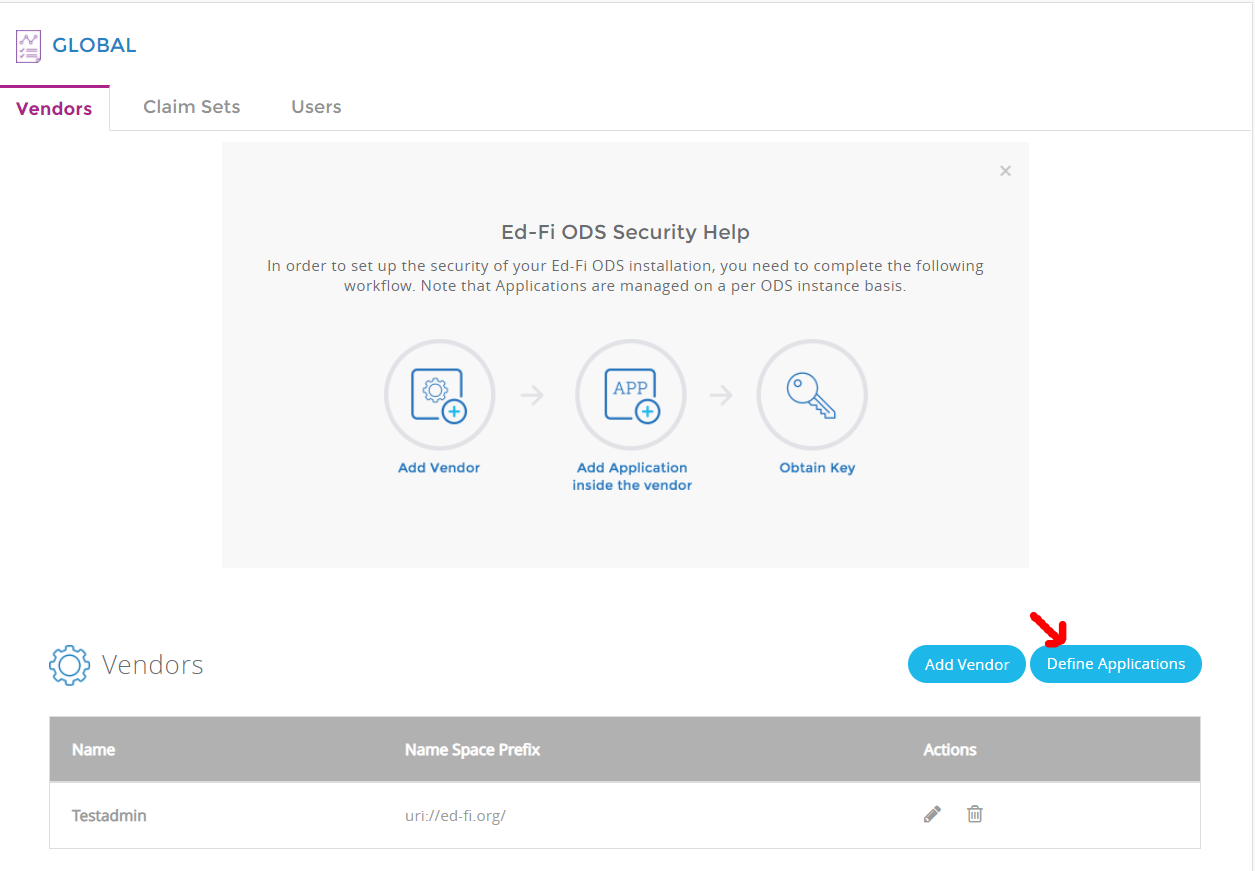
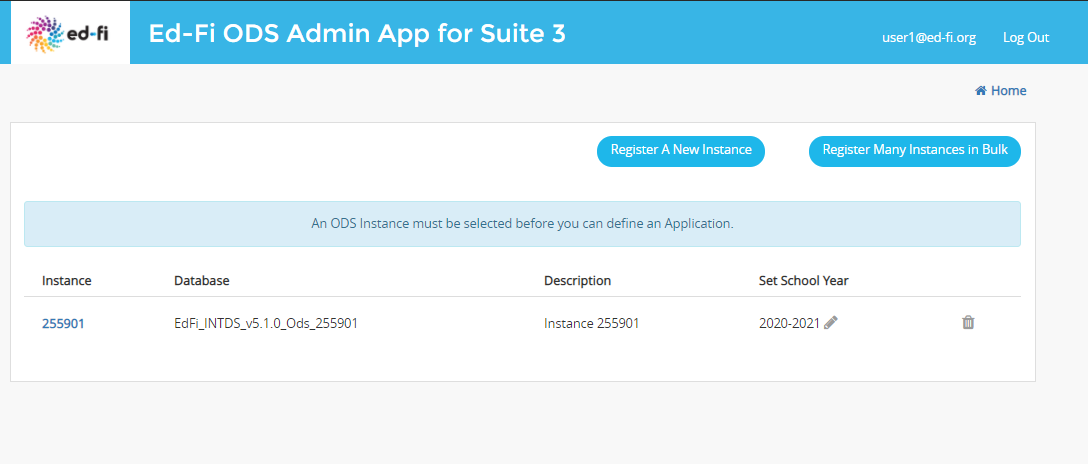
Now, we'll add an application to the vendor we just created. Applications are specific to an ODS / API instance. We can go to the Application creation screen using the Define Applications button that appears besides the Add Vendor button when we create the first vendor. In Shared Instance mode, the Define Applications button simply takes you to the Applications tab for the single instance. In District/Year Specific modes, the Define Applications button takes you to the Instance selection screen. If there are instances registered already, the user is guided to select an instance to define applications for it.
If there are no instances registered, a super admin user is guided to register an instance and define applications for it.
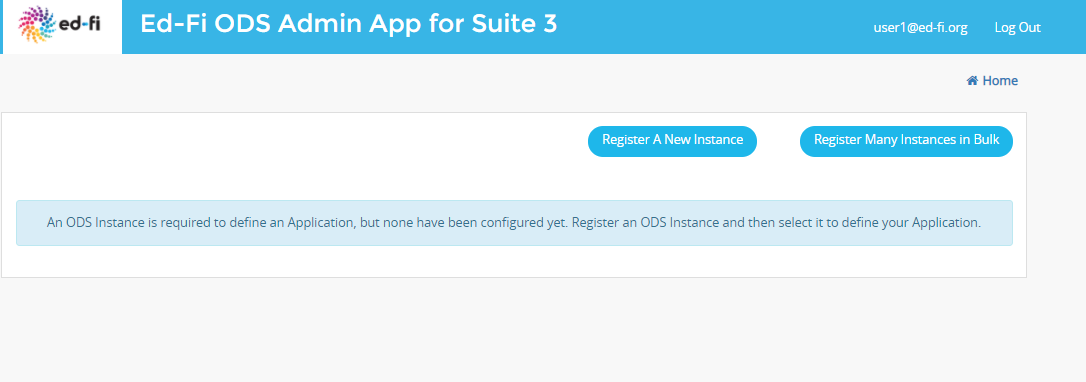
If there are no instances registered, a non-super admin user is guided to contact a super admin to get an instance assigned and proceed further.

Click on the Settings from Home page will take you to ODS Instance section.
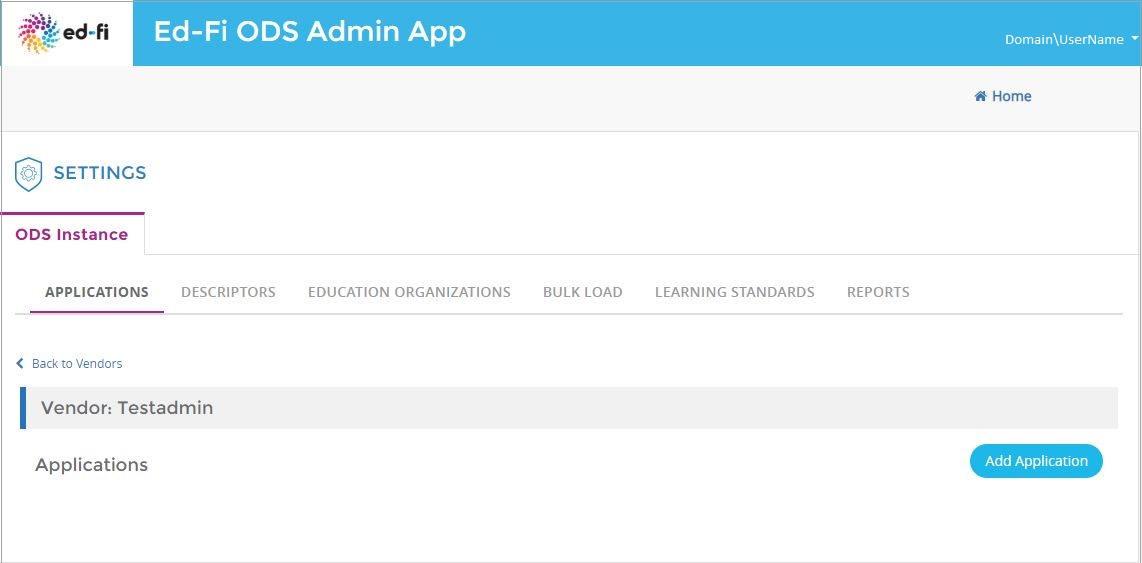
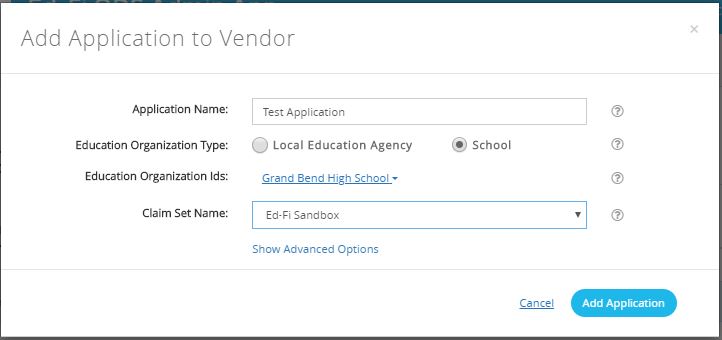
Clicking on Add Application will show following screen.
Steps for adding application to vendor
- Provide application name
- Select either option for education organization type
- Choose any available education organization ID from the drop-down menu
- Select appropriate claim set name
- Click Add Application to save the application
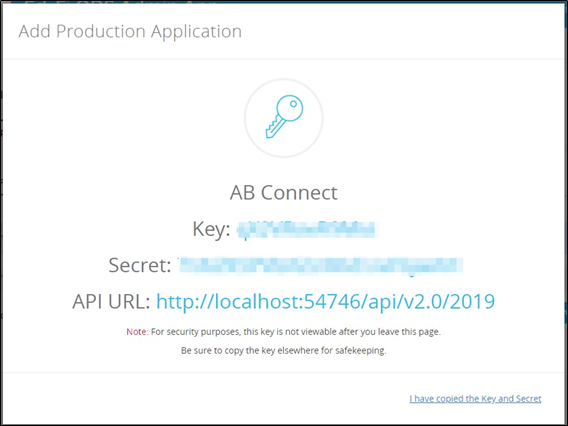
You will be presented with the Key and Secret at the next screen. Copy this information to a safe place.
It's useful to test client system functionality (in this document we will be using the generated key and secret for Bulk upload process).
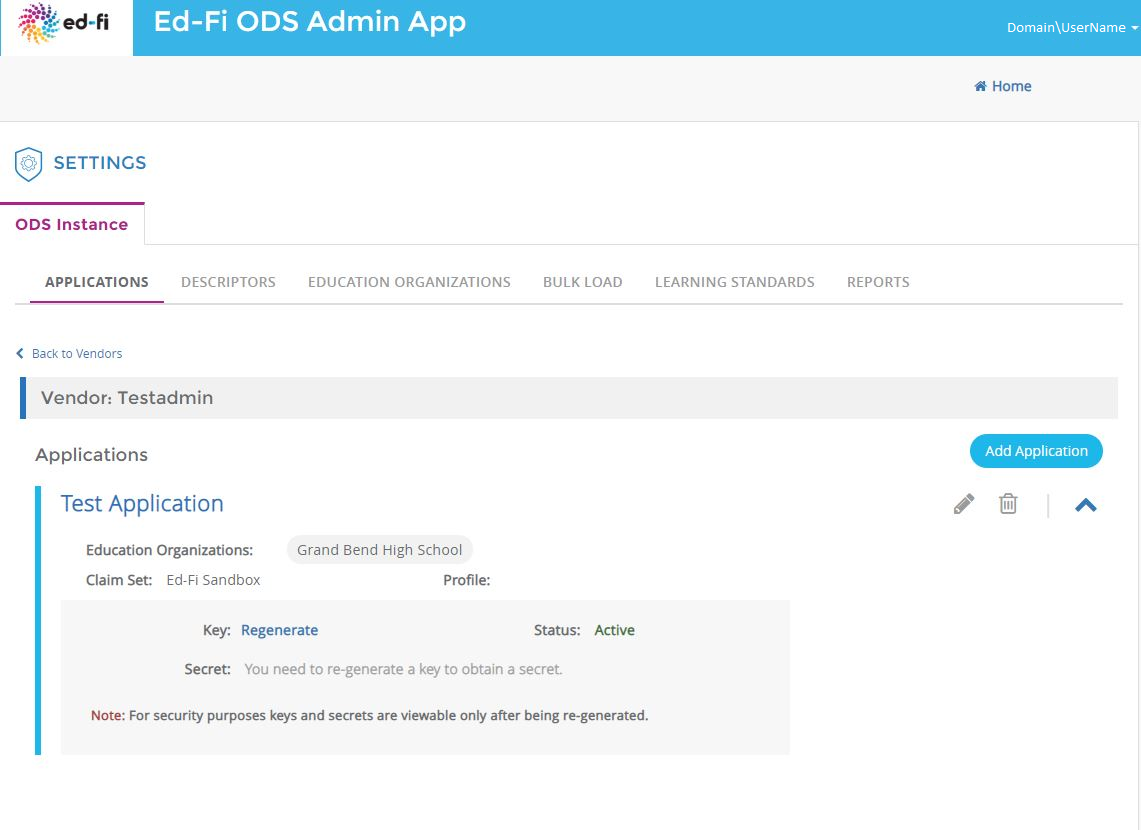
After completing the above step, you'll see the new Test application you just added.
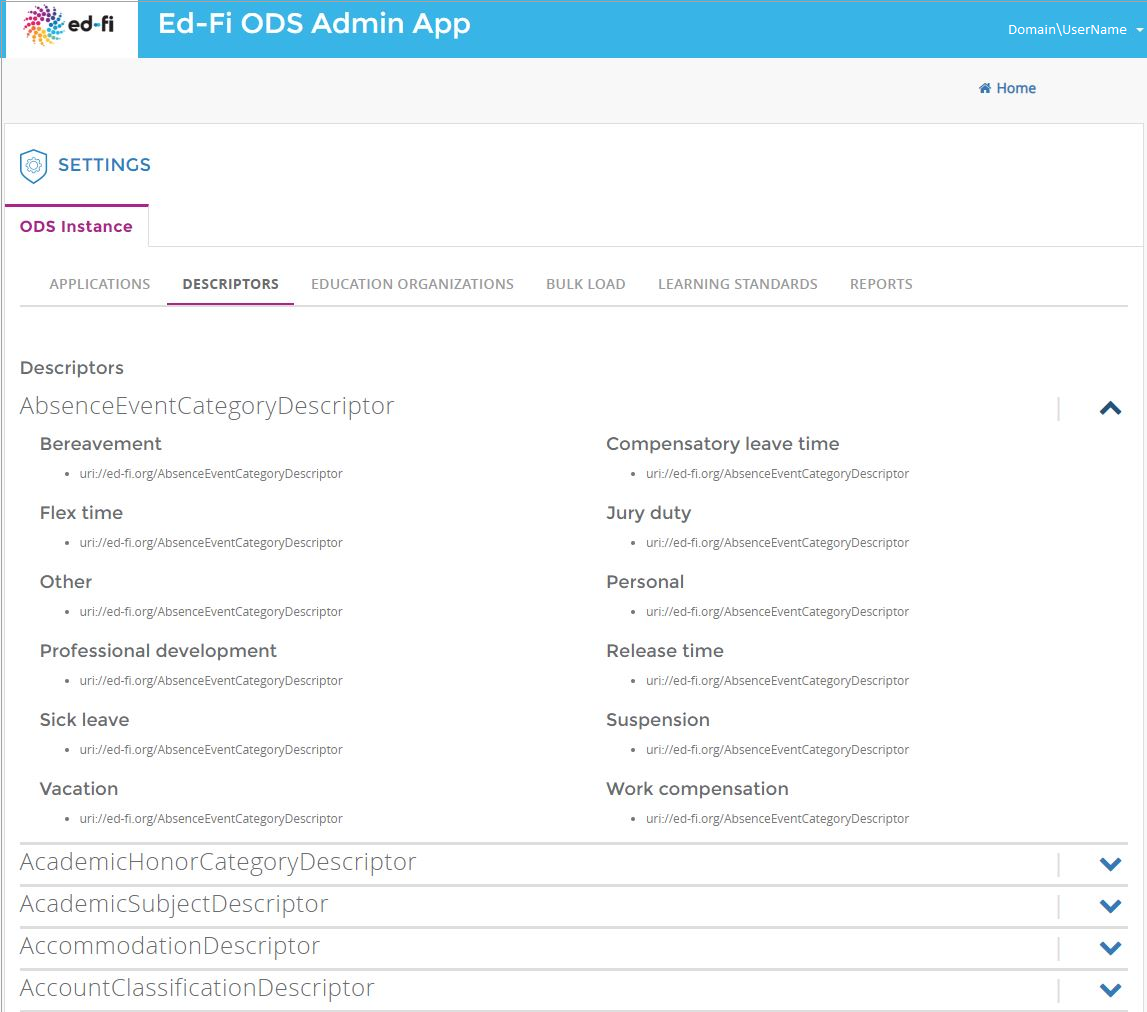
Descriptors tab
View configured descriptors for a known instance.
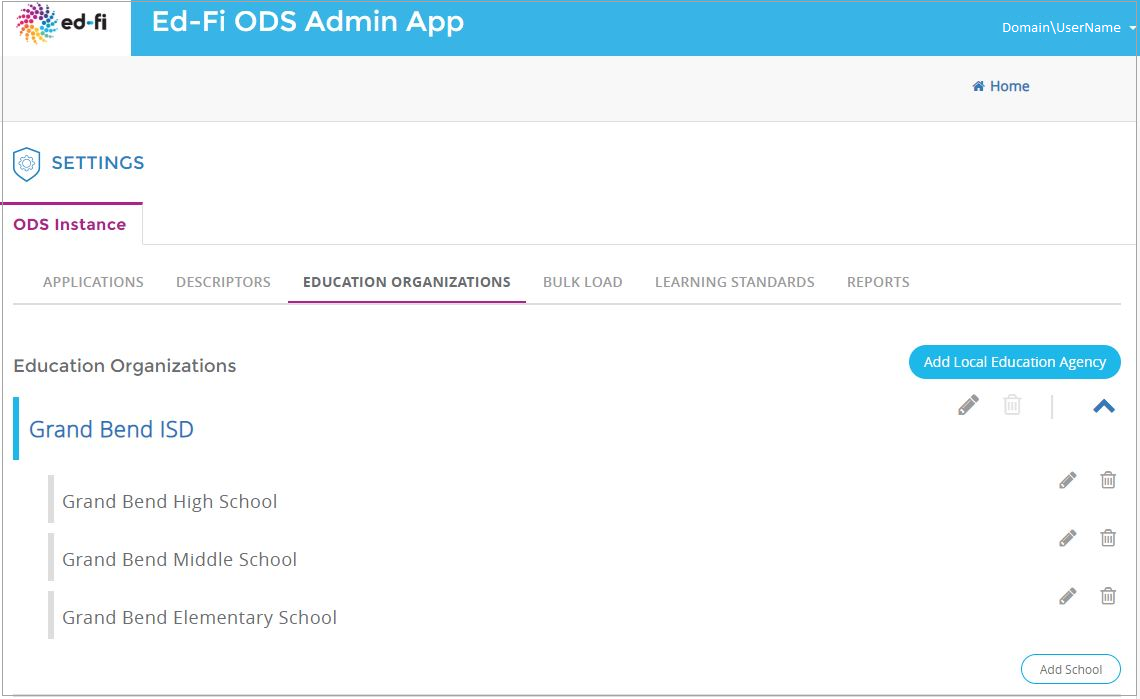
Education Organizations tab
View and manage education organizations (LEAs and schools).
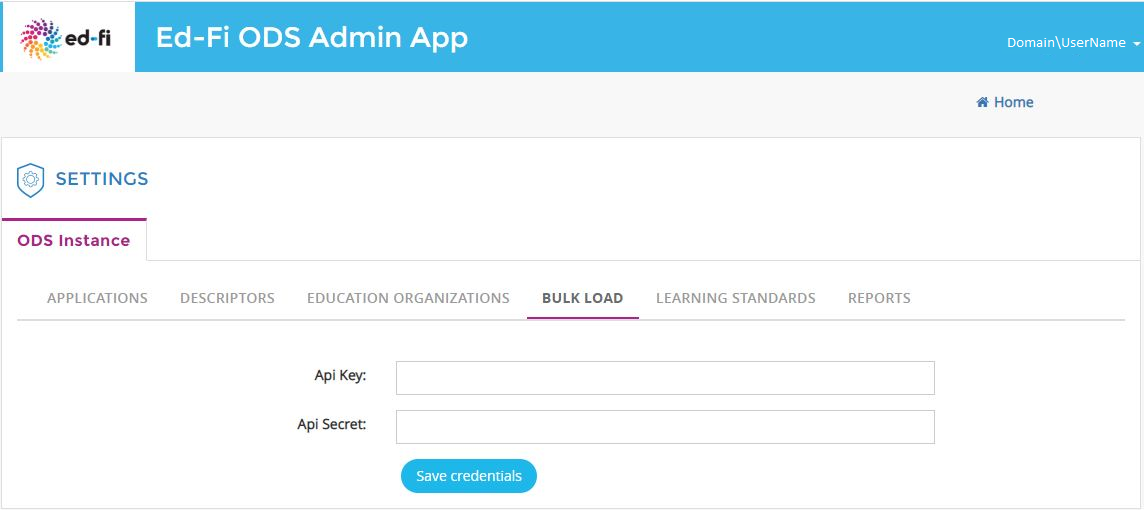
Bulk Upload process
You can enter a generated key and secret here and save the credentials. The saved key and secret will be used to authorize bulk upload processes.
After saving credentials, bulk upload page will be presented.
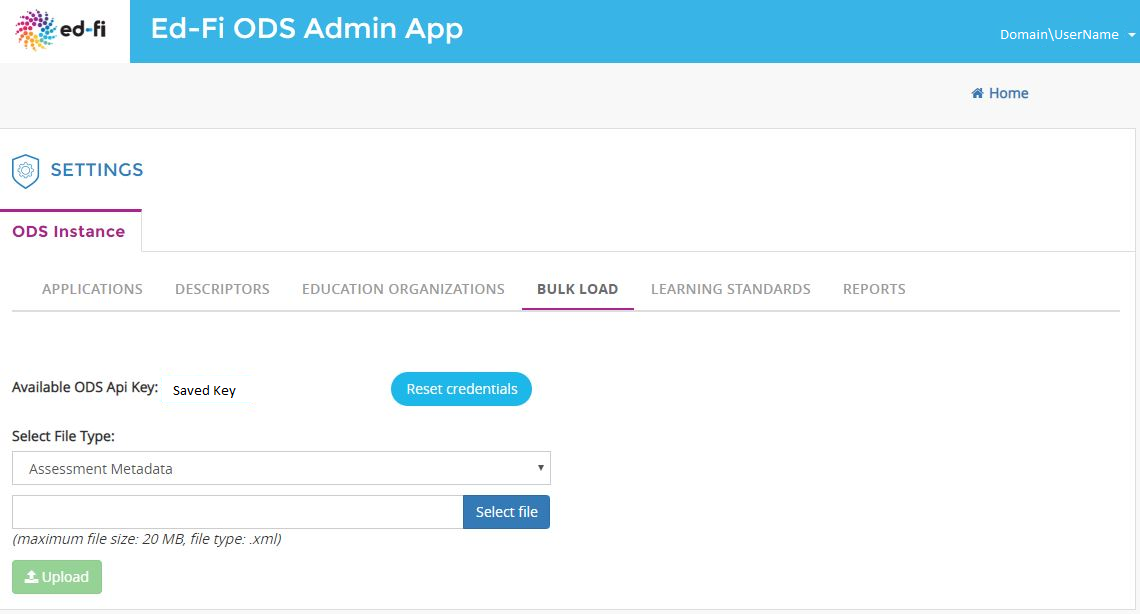
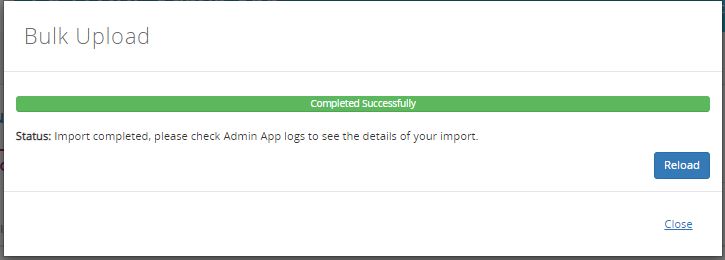
To perform upload, please select appropriate file type and input file and click upload. After clicking the upload button, the popup will display the upload progress.
Bulk upload is completed successfully.
Sync Learning Standards
In this step, we'll populate learning standards in the ODS / API by using the Admin App to synchronize with the AB Connect API.
To synchronize learning standards in on local environment, select the Learning Standards tab. You'll be presented with the screen below:
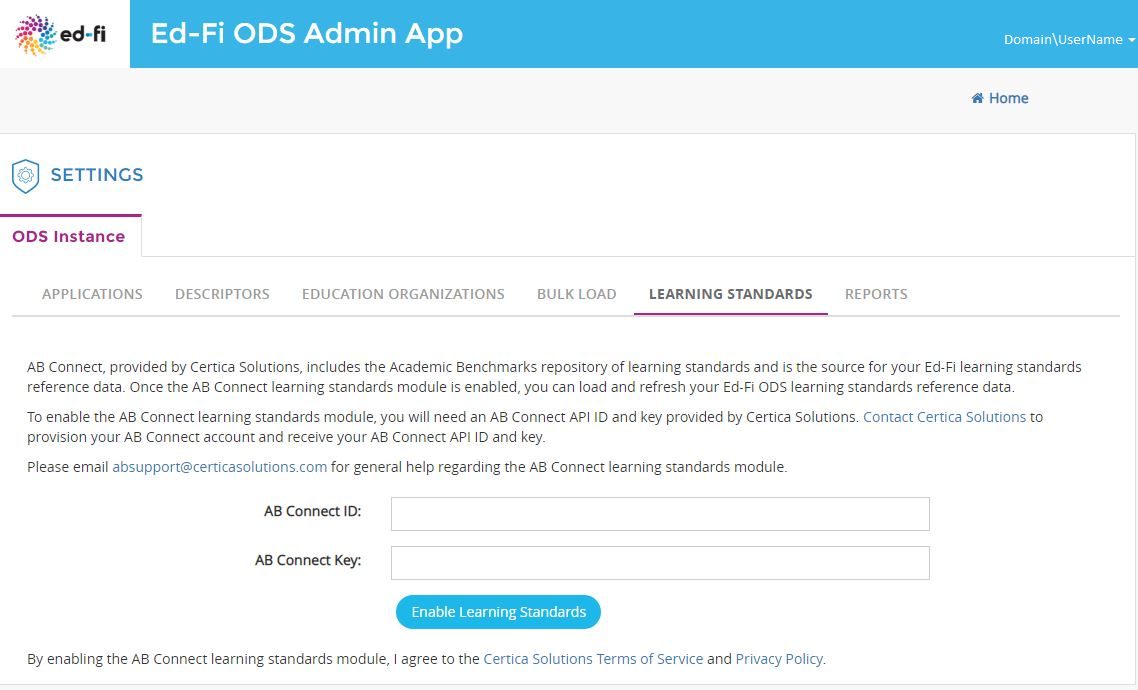
The screen contains instructions on how to get an API ID and Key from Instructure. Following the instructions on screen to obtain an ID and Key.
Please enter AB connect ID and Key obtained from Instructure and click Enable Learning Standards. Syncing will begin. A progress bar will show you the current status, and you'll see a "completed successfully" message once done.

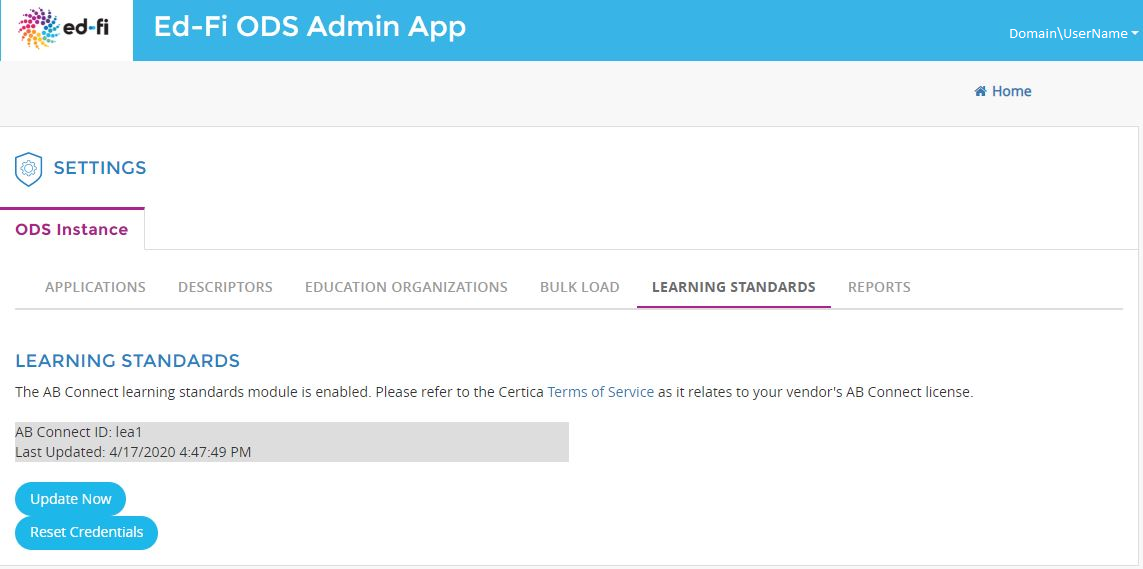
Clicking Reload will take you to the following screen, where you can reset the AB connect credentials or update the learning standards.
Optional Verification Step
To confirm that learning standards have been populated, a SQL query, such as shown below, can be run against your ODS / API instance database. The query should return a count in the thousands from a successful learning standards synchronization:
SELECT COUNT(*) FROM EdFi.LearningStandard WHERE [Namespace] LIKE '%api.academicbenchmarks%';
Reports
Select Reports tab for Ods Instance specific reports.
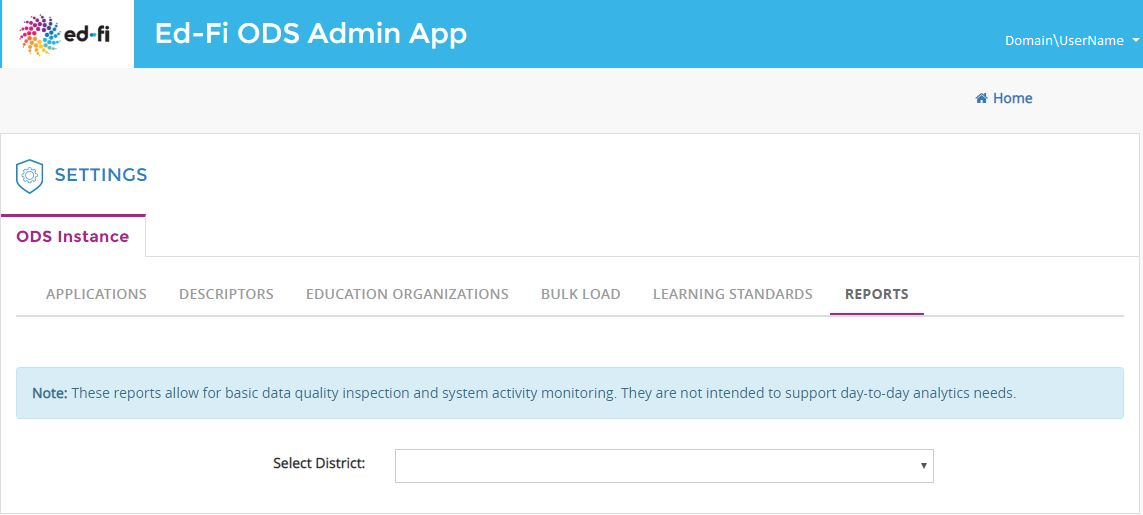
Choosing district will provide district specific reports.
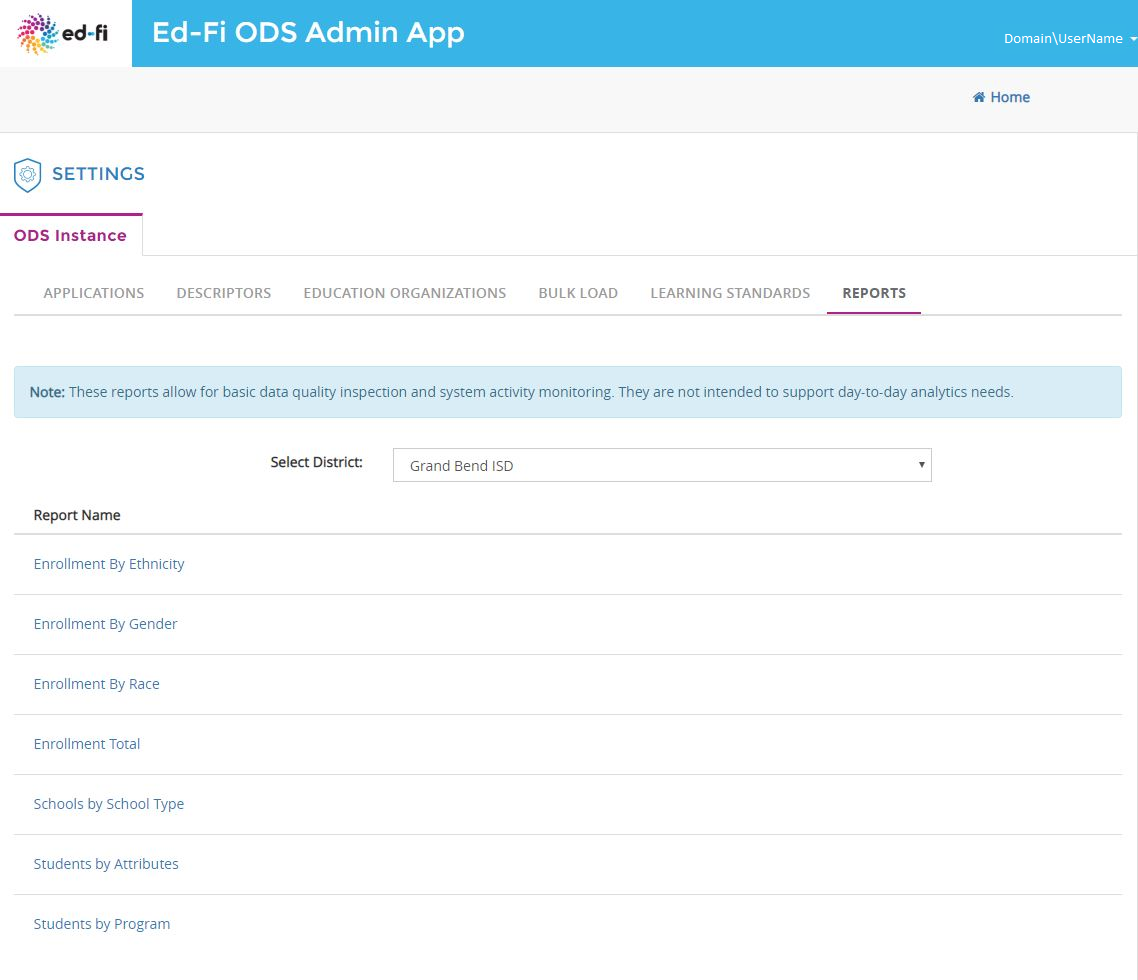
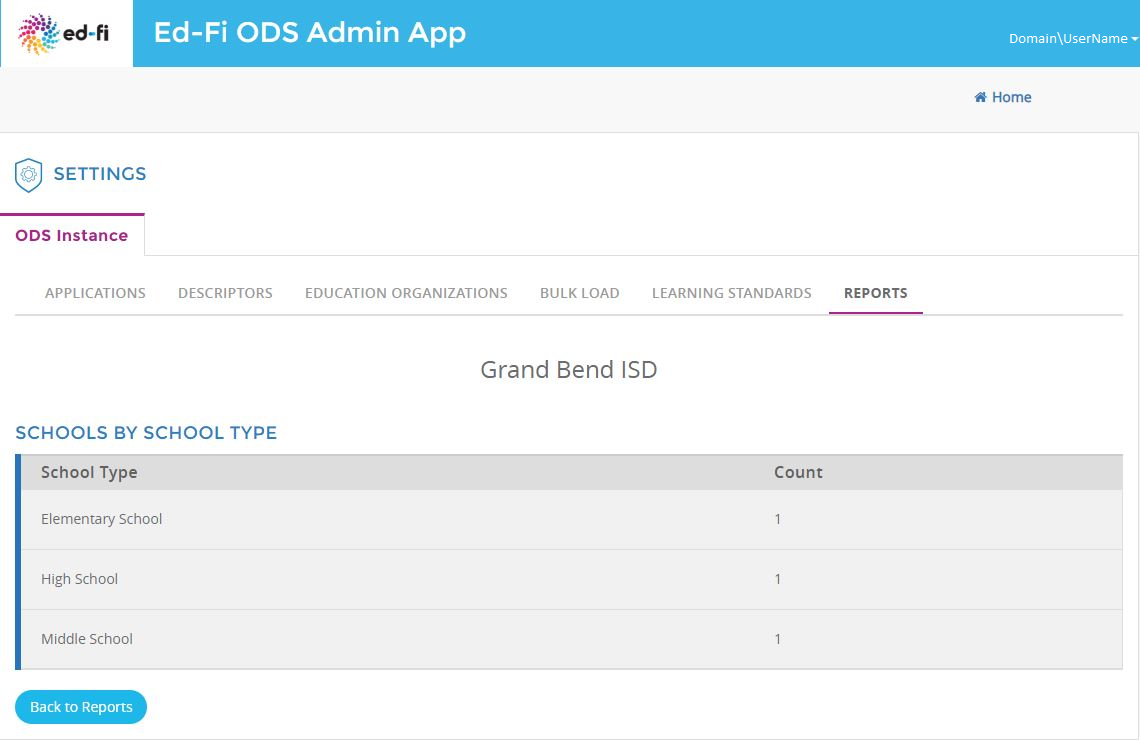
By clicking on the individual report link will take you to the detailed report page.
New features in Admin App 2.2
Product Improvement
User can find Product Improvement details here.
Edit School Year
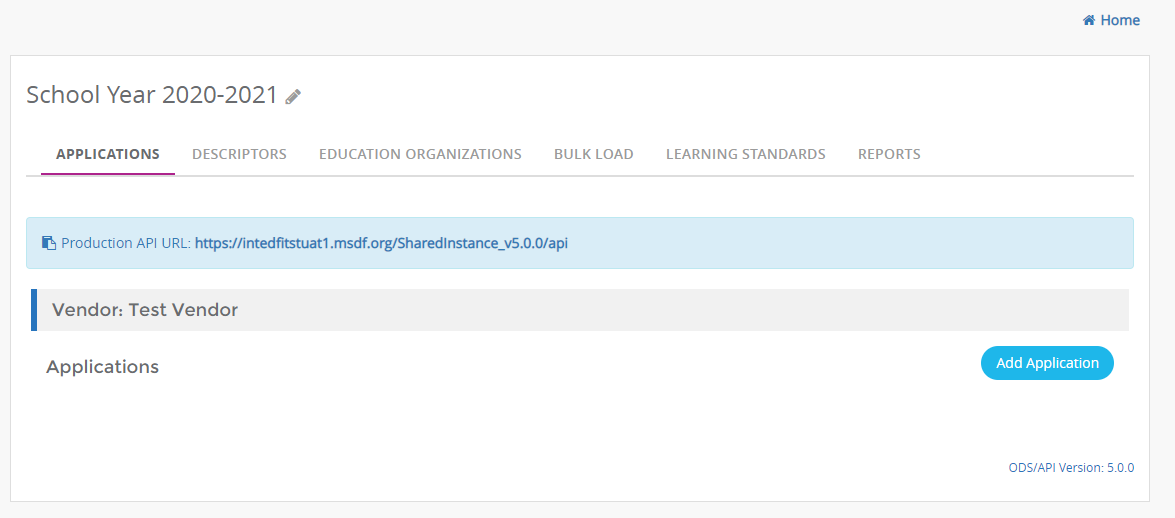
In this step, the user can set the ODS instance-level School Year setting. The school year dropdown provides a list of possible years and lets the Admin App user witness the current selection as well as change that selection.
In Shared Instance mode, the year selection is visible and editable in the header of the Instance Settings screen.
In District/Year Specific modes, the Set School Year column is visible
and editable for the registered instances on the Registered Instances screen.


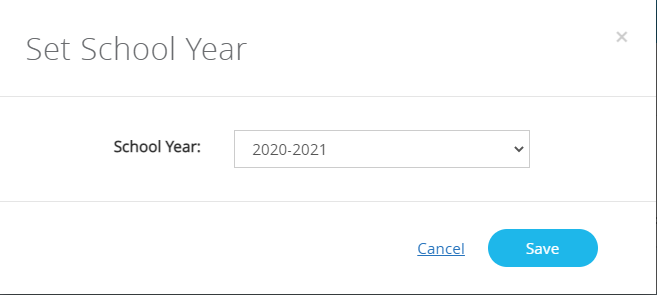
Clicking the edit pencil icon opens up a modal to select the current school year from the dropdown of possible school years.
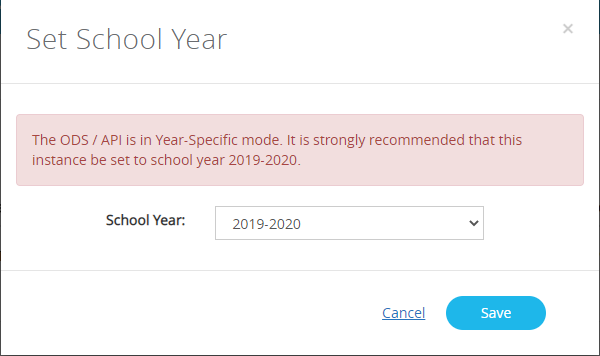
There are special considerations for Year Specific mode. At instance registration time, we default the instance's year selection to the single year that the instance is dedicated for, saving the user from (likely) ever needing to edit it themselves. However, we do still offer the controls, primarily so a user could correct the system if the school year was altered outside of the app. When a user goes to edit the year in Year Specific mode, we put up a warning as well as suggest exactly what value is expected for that instance. This warning and suggestion also helps to guide the user away from an "off by one" mistake as "Current Year 2021" really corresponds with a "2020-2021" school year.
Review Ed-Fi ODS / API Documentation
If you're new to the Ed-Fi ODS / API — or even if you're upgrading from a previous version in tandem with installing the Admin App — the product documentation for your solution has additional information you'll find useful:
- The Ed-Fi ODS / API v5.2 documentation is available online here.
- You can find documentation for prior version at Ed-Fi Technology Suite Supported Versions
The Platform Developers' Guide and API Client Developers' Guide are essential reading for platform hosts.
Admin App Source Code Access
Admin App source code is available under Apache 2 license terms, and can be found at https://github.com/Ed-Fi-Alliance-OSS/Ed-Fi-ODS-AdminApp.
