Configuring a Data Import Agent to use FTPS
Data Import supports configuring agents to retrieve files from secure file transfer protocols, namely SFTP (Secure File Transfer Protocol) and FTPS (File Transfer Protocol over SSL). This article provides guidance on how to add a Data Import Agent with a type of FTPS, to communicate with an FTPS service running in IIS.
Step 1: Create an FTPS site in IIS
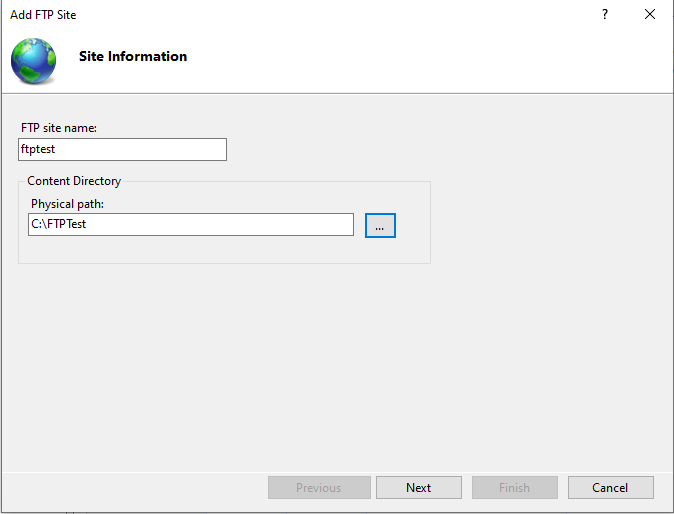
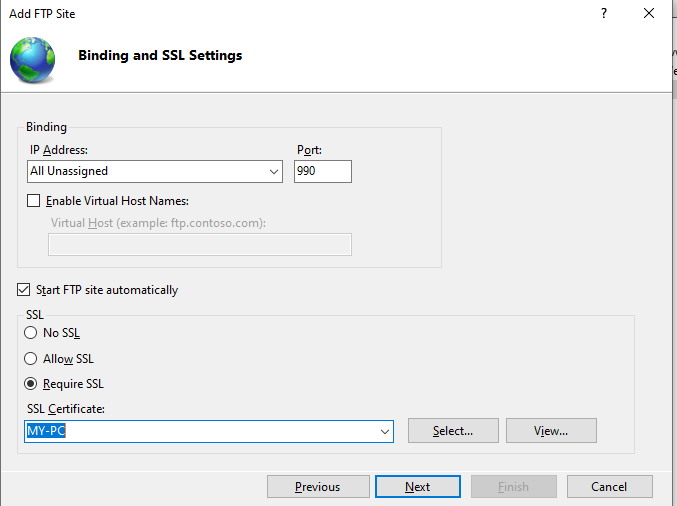
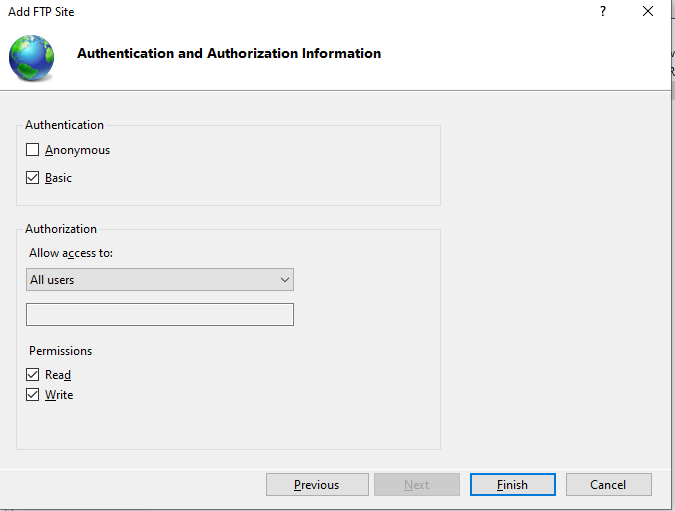
- Review the documentation for creating an FTPS site, Scenario: Build an FTP Site on IIS. Note that, with reference, to FTP over SSL in IIS, Data Import v1.0.1's support for FTPS is implicit on port 990..
- The screen grabs below show the step-by-step wizard entries

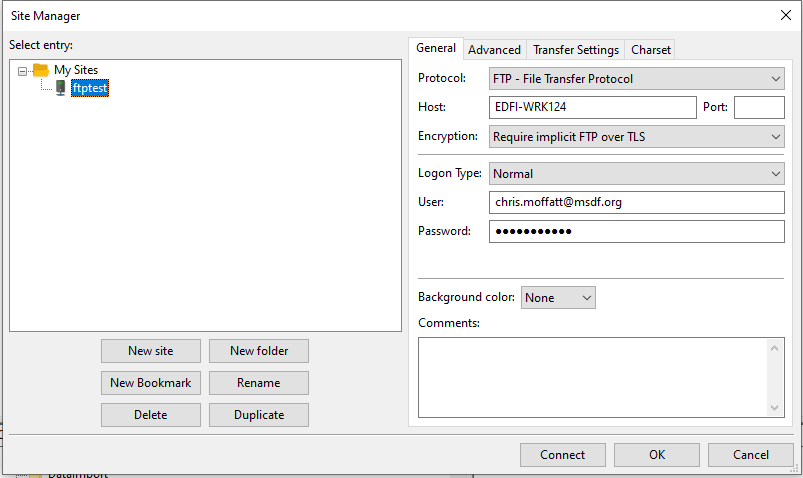
Step 2: Verify you can connect to the FTPS service using an FTP client
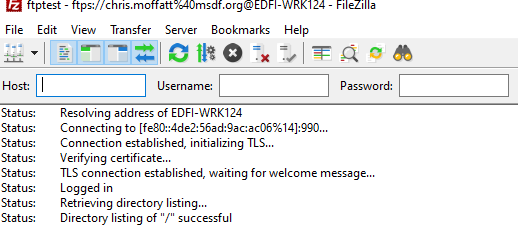
- Use an FTP client such as FileZilla to verify that you can connect to the FTPS site you have created.The screen grapbs below show the configuration and successful connection using the FileZilla client.
Step 3: Configure a Data Import Agent to use FTPS
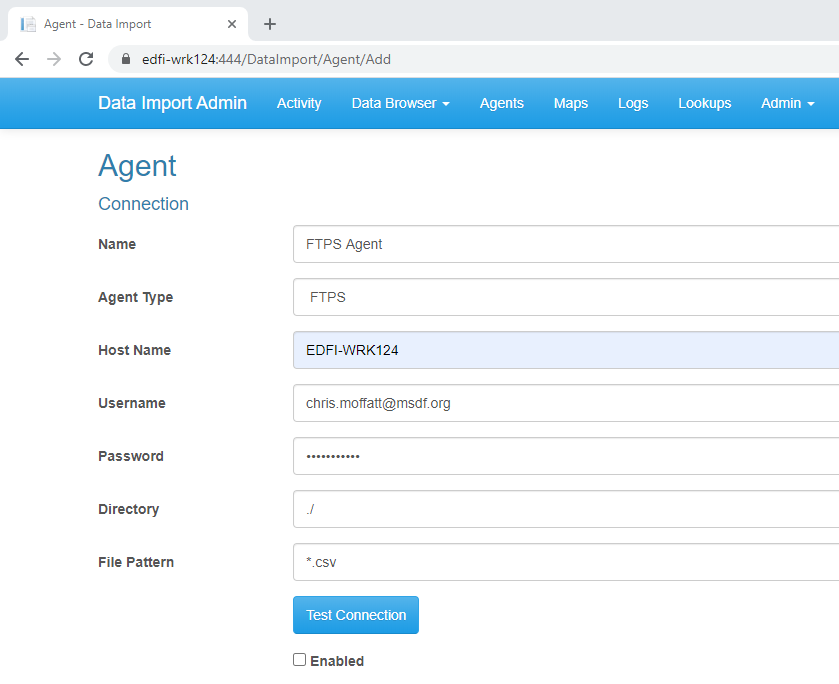
- Using Data Import, aavigate to Agents in the main tool bar and select Add Agent.
- Enter an Name and select Agent Type = FTPS.
- Fill in the remainder of the fields to match the FTPS site you created in Step 1 and values you tested with in Step 2.
| Property Name | Value |
|---|---|
| Host Name | The name of the server hosting the FTPS site |
| Username | User name to connect to the FTPS site with |
| Password | Password for the supplied username |
| Directory | FTP directory, usually "./" |
| File Pattern | The file pattern that the Data Import agent will use to retrieve files from the FTPS location, usually "*.csv" |
- Select Test Connection, and you should get a successful message
- Select the Enabled check box and add details on data maps to be processed by this agent
