Global Administration Tasks – Setup Guide
This guide walks you through the initial global administration setup in the Ed-Fi Admin App. It is designed to help system administrators configure the core elements required for tenant and environment management.
The Ed-Fi Admin App shares code with the Starting Blocks Admin App from Education Analytics. Although this documentation is generally the same as that for Starting Blocks Admin App, users of Starting Blocks should preferentially refer to its official documentation rather than this document.
Environments
Creating a New Environment
An environment is a paired deployment of an Ed-Fi ODS/API and an Ed-Fi ODS Admin API application. These deployments can operate with multiple ODS Instances (e.g. for separate school years) and, with ODS/API 7+, can also operate in multi-tenant mode. The environment encompasses both concepts. Any pair of ODS/API and Admin API operating together constitutes the environment.
To create a new environment:
-
Navigate to Home > Environments
-
Click Connect new environment
-
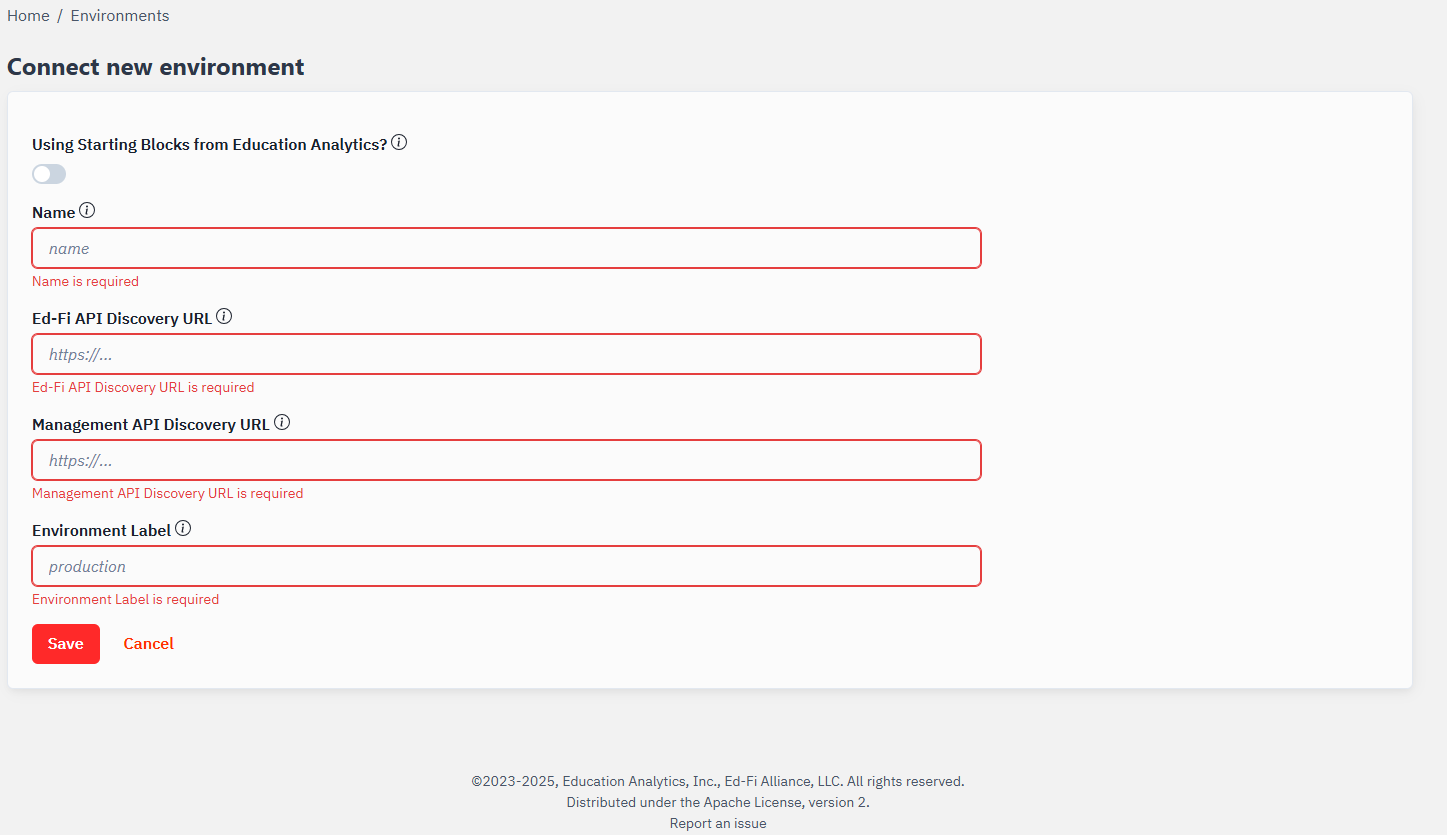
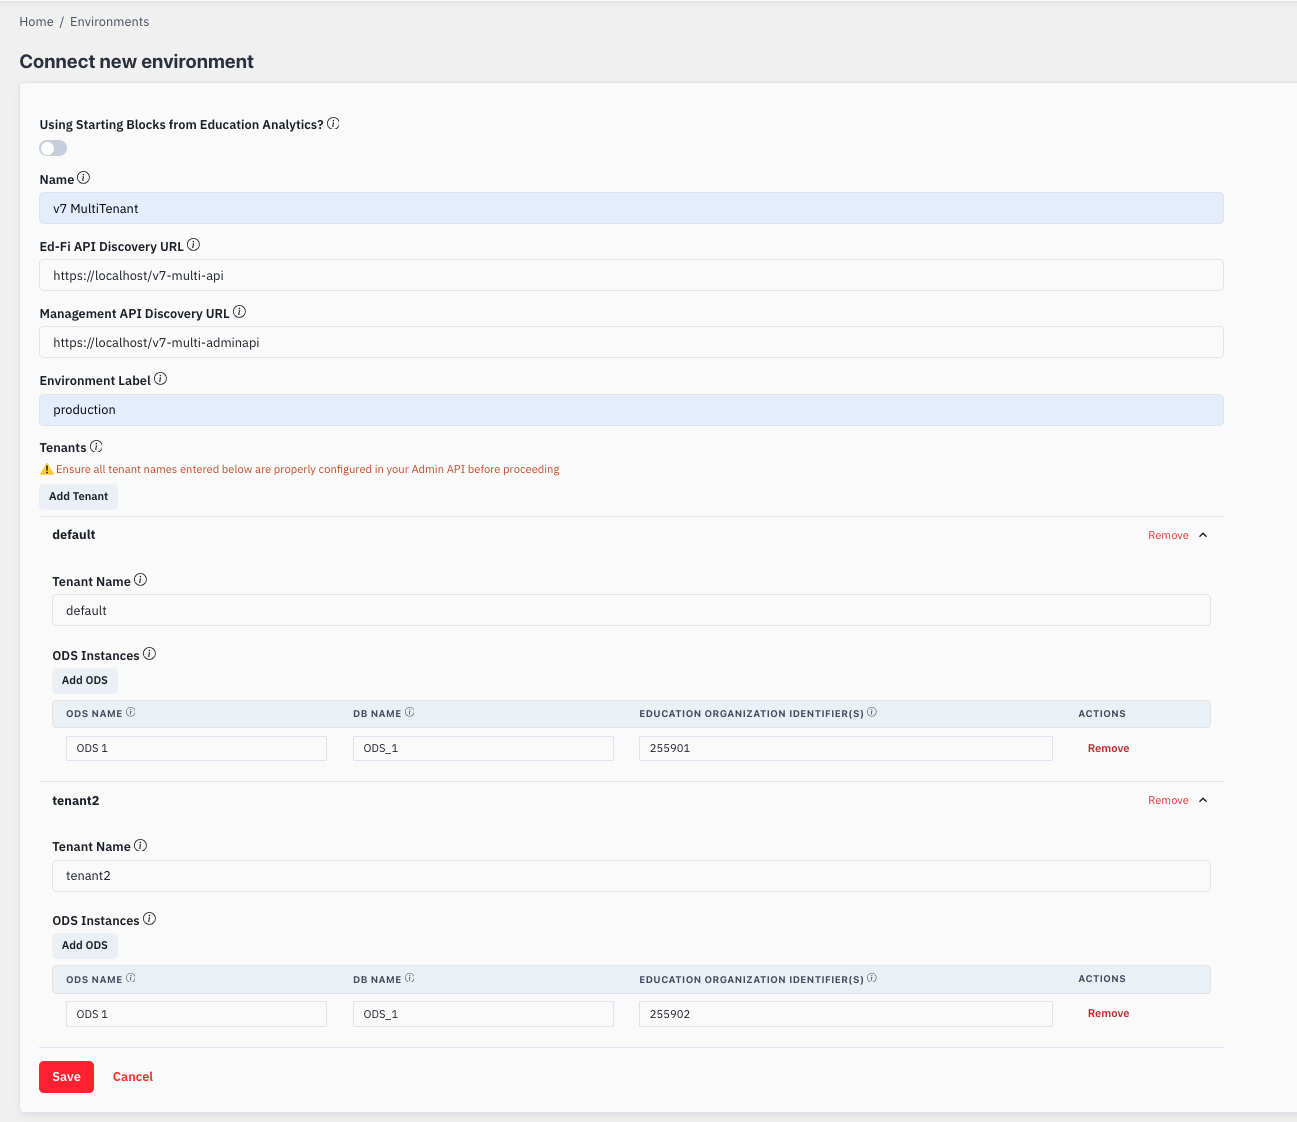
Fill in the following fields:
Field Description Using Starting Blocks from Education Analytics? Leave it OFF, otherwise the system will try to connect to a Starting Blocks deployment. Name Enter a descriptive name for this environment. Ed-Fi API Discovery URL Enter the URL where the Ed-Fi ODS/API discovery endpoint is available (e.g., https://api.example.org).Management API Discovery URL Enter the URL where the Admin API discovery endpoint is available. Environment Label Enter a label to identify this environment (e.g., "production", "development", "staging"). -
Click Save to create the environment.
- All URL fields must be valid, accessible endpoints
- The system will attempt to validate these connections when you save
Global Administrator Access to Environments
Once an environment has been created, the Global Administrator will already have access to perform some tasks. However, the Global Administrator's permissions were not designed for environment management. When regularly using a Global Administrator account, it is best to assign that account to a team that has ownership over all relevant environments. Doing so will ensure the right permissions have been applied.
Continue reading for more information about teams and ownerships.
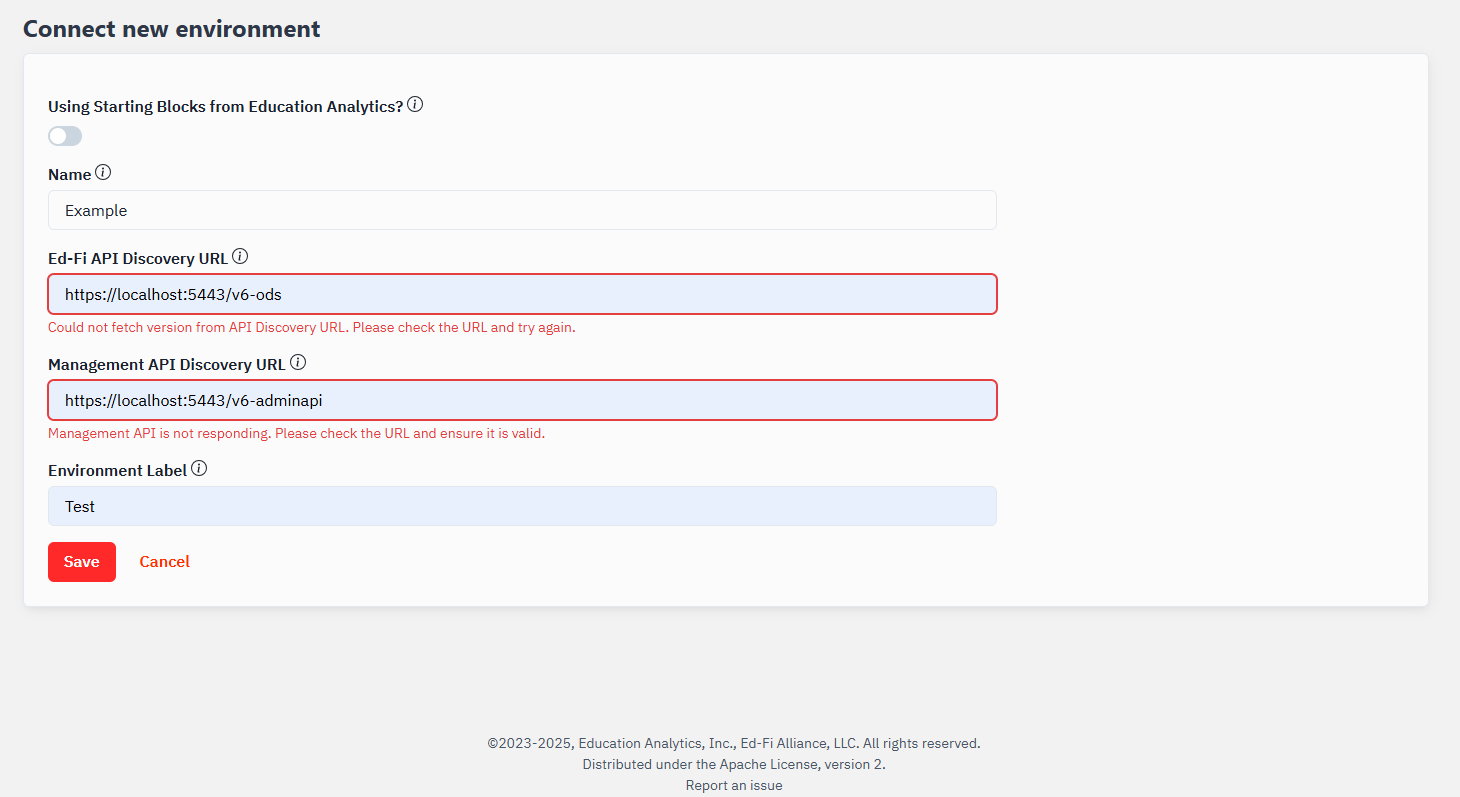
Environment Validations
-
When an URL is invalid the error would be shown in the specific field.
-
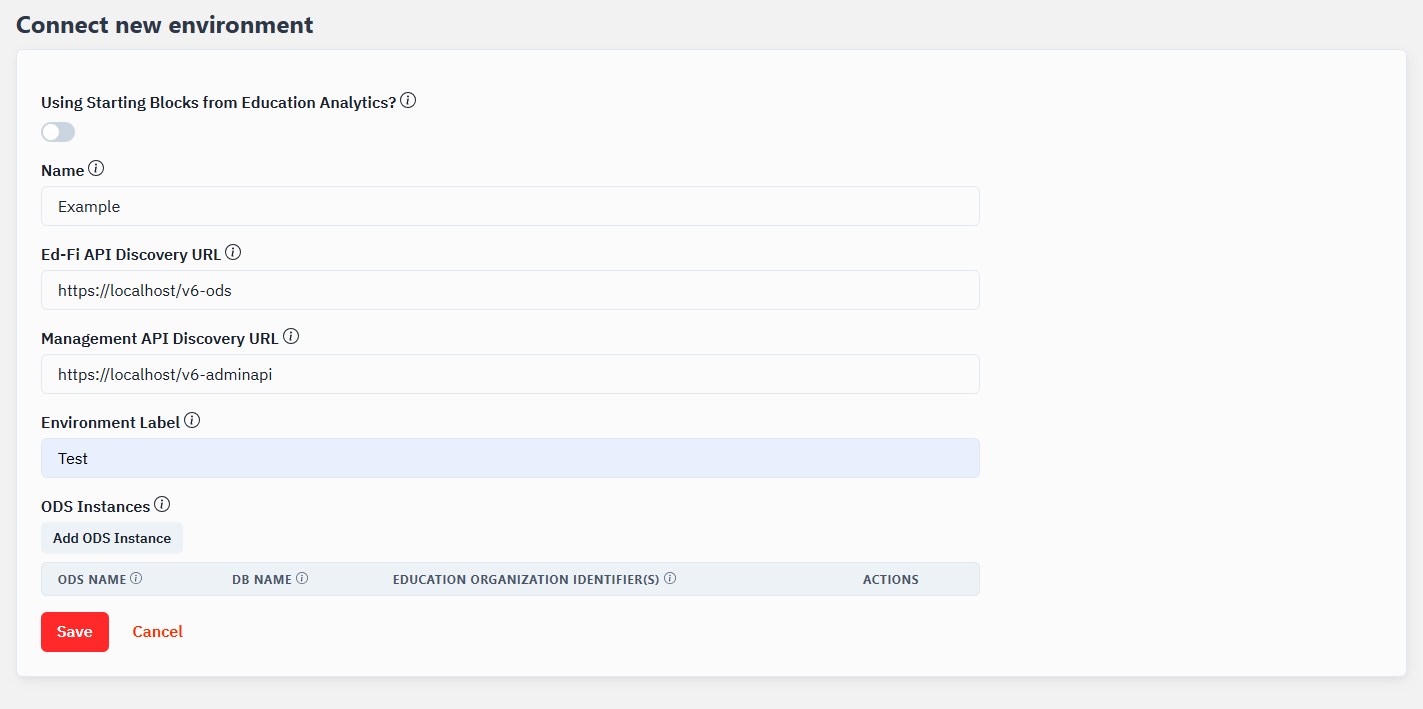
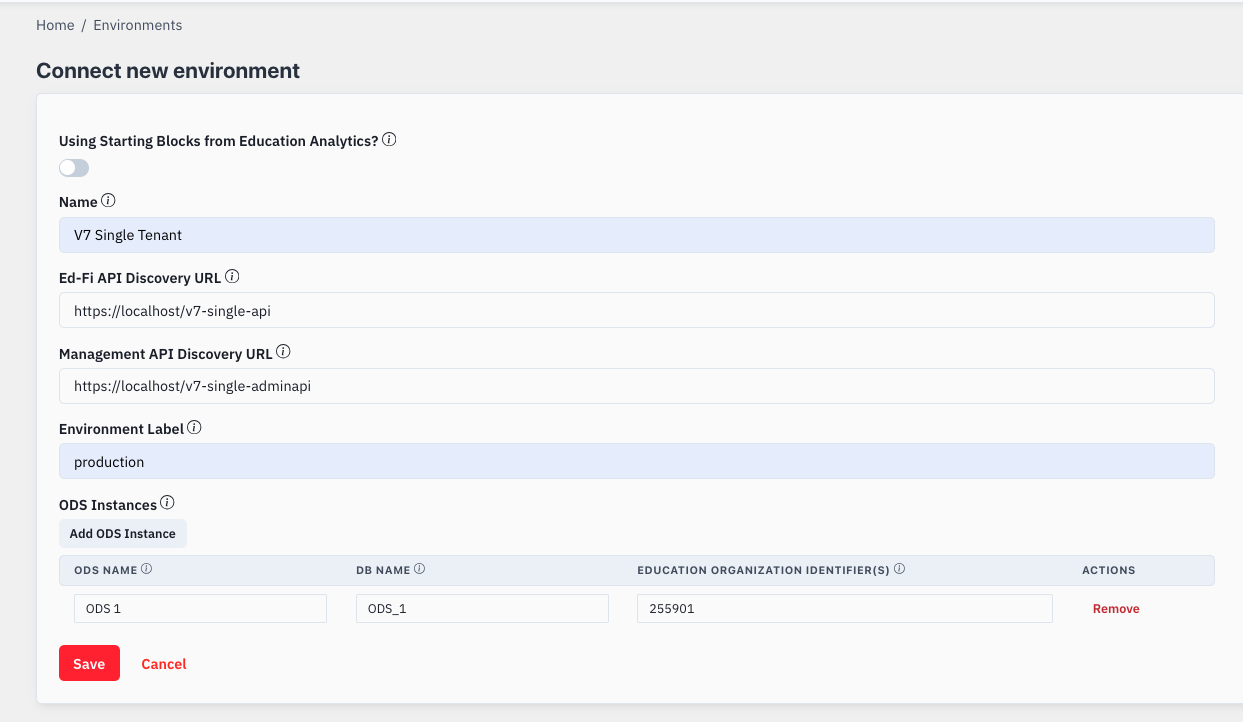
When creating an environment, the app autodetects whether it's a v6 or v7 environment. Based on this detection, the app will configure tenants accordingly. For v6 environments, there will be a default tenant created automatically. For v7 environments, you'll be able to create multiple tenants.
Single Tenant v6
Single Tenant v7
Multi-Tenant v7
Teams
Teams allow you to organize users and control their access to resources within the Admin App. Creating teams is essential for proper privilege management.
Creating a New Team
- Navigate to Global > Teams in the main navigation menu
- Click Create Team button
- Fill in the following information:
- Name: Enter a descriptive name for the team (e.g., "District Admins", "API Managers")
- Click Save to create the team
- Use clear, descriptive names that indicate the team's purpose
Granting Ownership to Environments
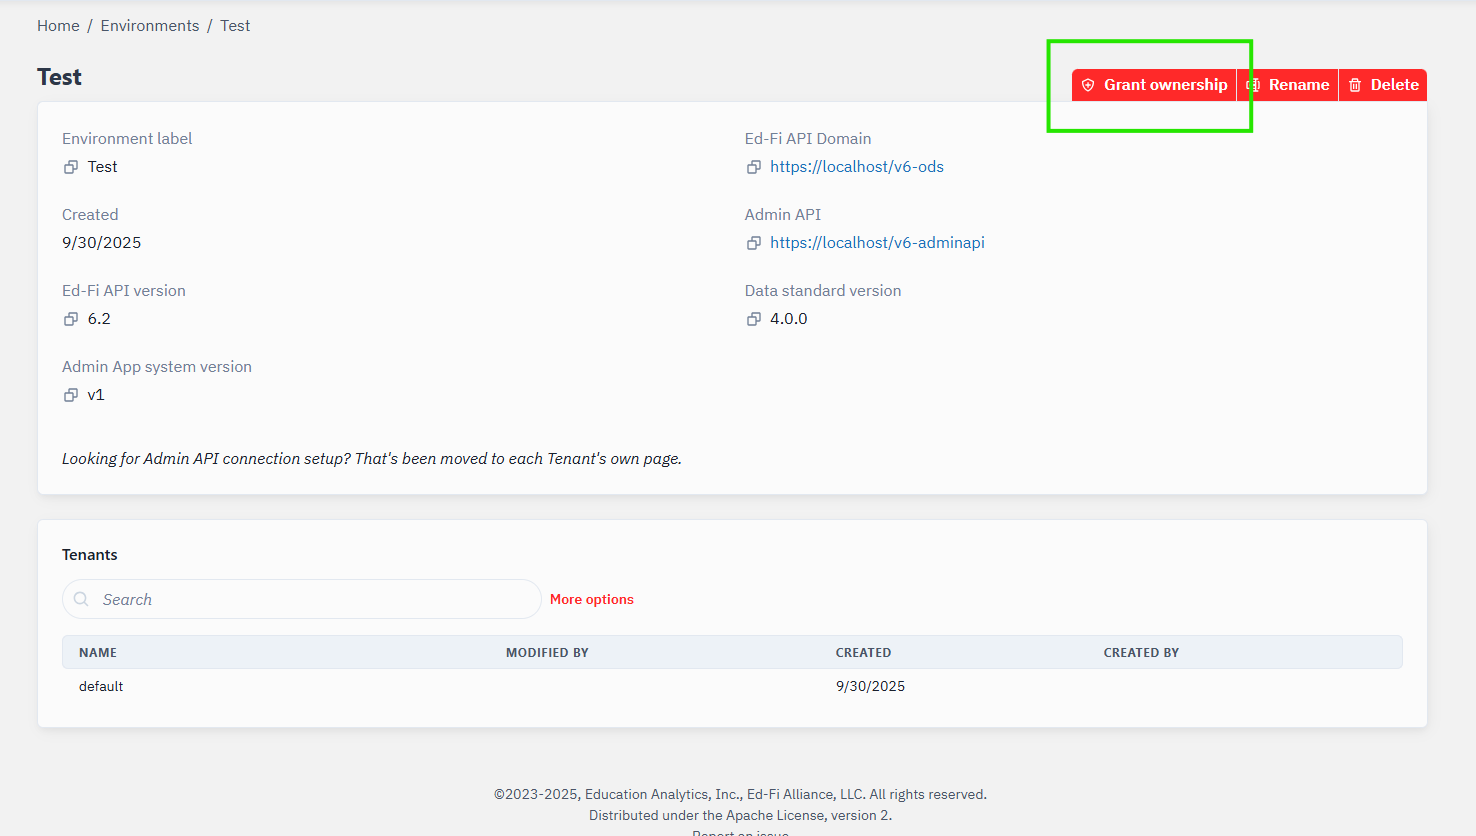
For an environment to be managed, you must grant ownership to a team. This process allows team members to manage the environment with their different privilege levels. Follow these steps:
- Select the environment
- Click "Grant Ownership"
From step 2, follow the guide in Managing Resource Ownership to complete this process.
Managing Teams
After creating a team, you'll have access to several important management functions:
-
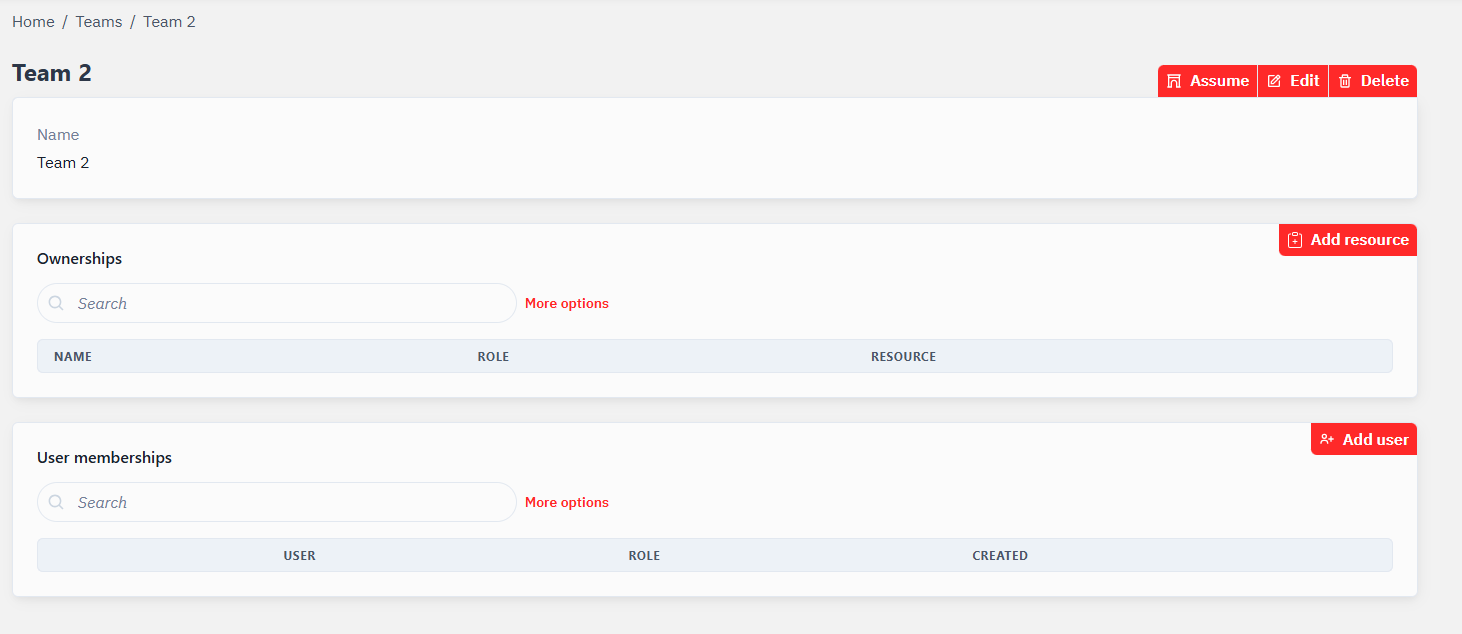
Assume Team Role: Click the "Assume" button to switch to this team's context, allowing you to manage resources on behalf of the team. When you assume a team role, you can access and modify all resources the team has been granted ownership to, based on the team's assigned roles and privileges.
-
Grant Resource Ownership: Use the "Add resource" button to give the team access to specific resources like environments, tenants, or applications. This defines what this team can manage within the system.
-
Manage Team Membership: Click the "Add user" button to add users to this team. Users added to the team will inherit the access permissions defined by the team's role assignments.
These management options make it easy to configure exactly what each team can see and do within the Ed-Fi Admin App.
Team Memberships
Team memberships connect users to teams and determine their level of access within those teams.
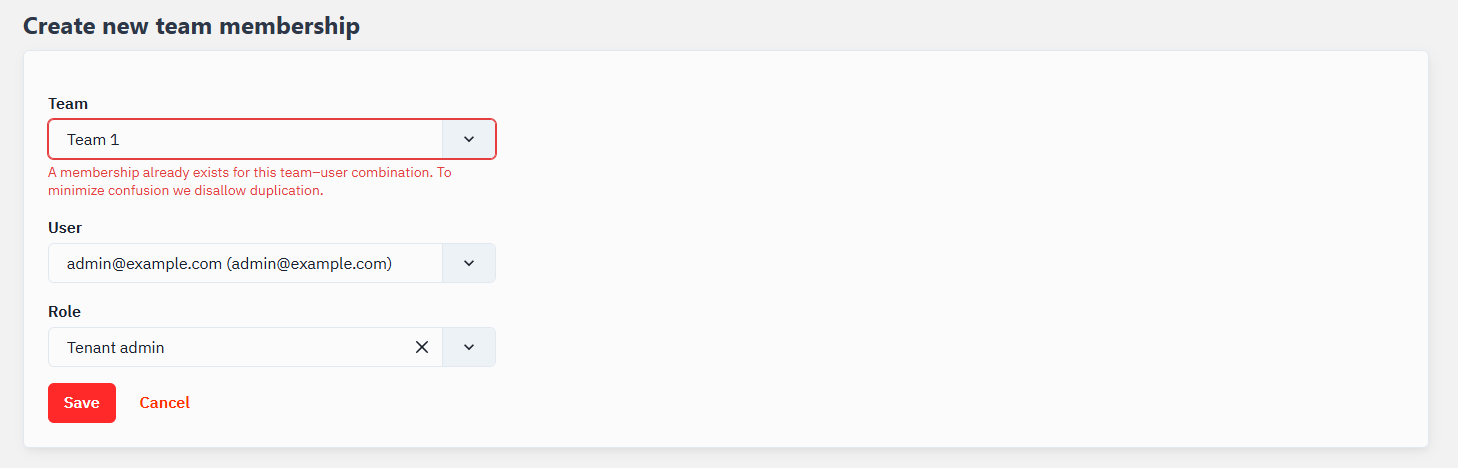
Adding a Team Membership
- Navigate to Global > Team Memberships in the main navigation menu
- Click Create Team Membership button
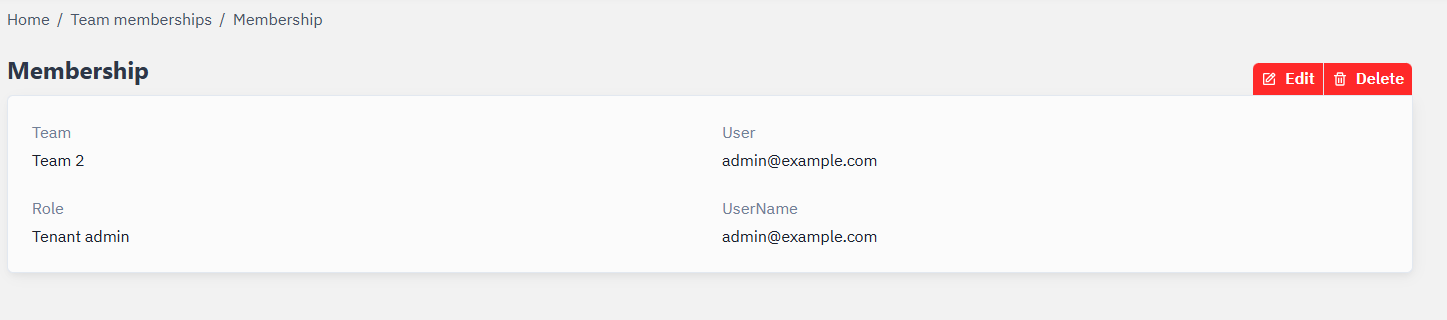
- Fill in the following information:
- Team: Select the team this membership applies to.
- User: Select user account.
- Role: Select the role with the appropriate level of access within the team.
- Click Save to create the membership
- Admin: Full administrative access to manage settings, resources, and perform all administrative functions
- Standard: Standard access to work with resources with limited administrative capabilities
- Viewer: Read-only access to resources and settings without modification privileges
Roles
Roles determine what actions users can perform within the Admin App. Each role contains a set of privileges that can be assigned or revoked.
Configuring Role Privileges
- Navigate to Global > Roles in the main navigation menu
- Find and click on the role you want to modify (e.g., Admin, Standard, Viewer)
- In the privileges list, select or unselect the privileges you want to grant to the role
- Click Save after modifying the role
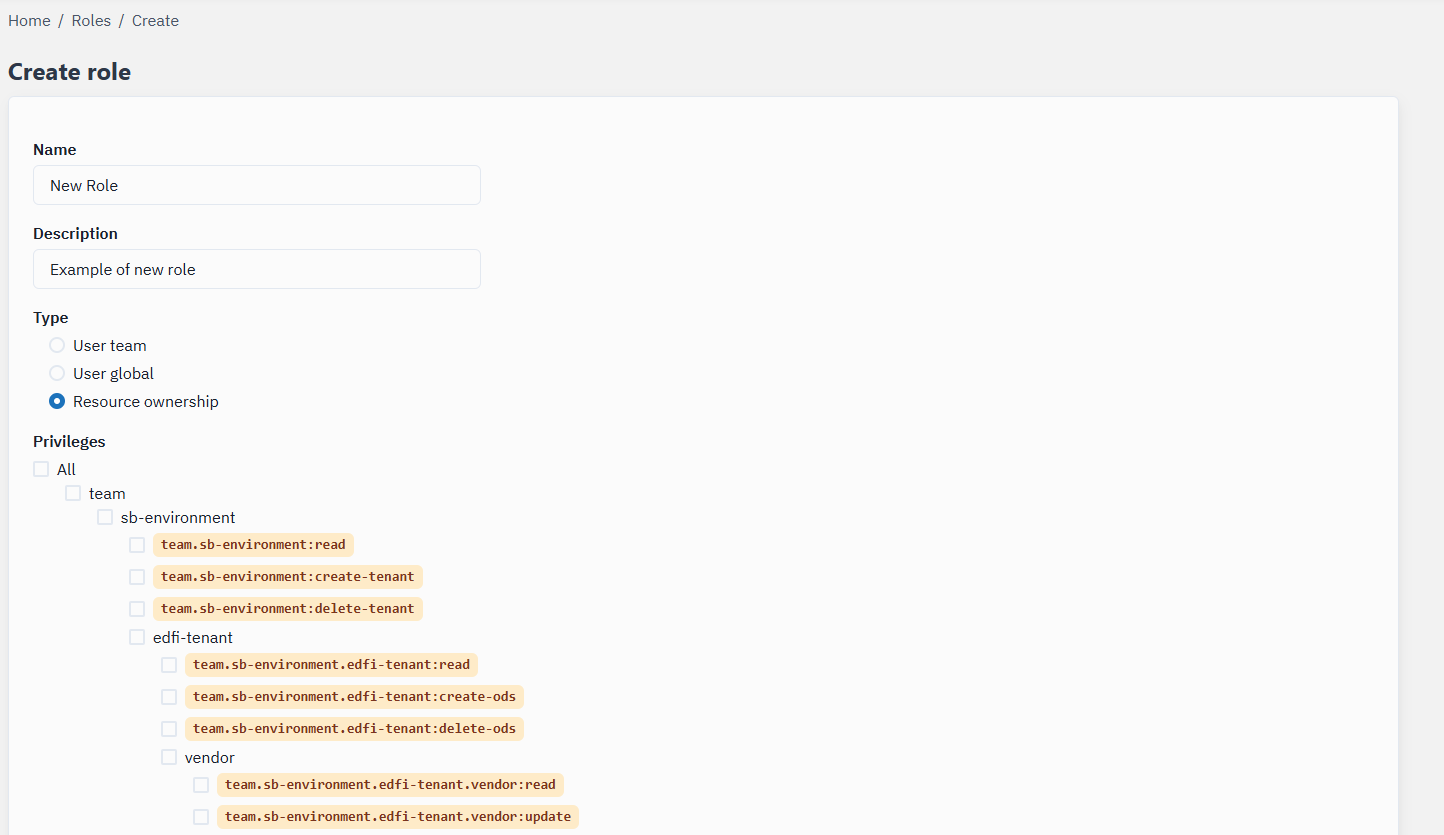
Role Types
The Type field in the role configuration specifies the context where this role applies:
- User team: Roles that determine permissions within a specific team context
- User global: Roles that apply globally across the system for users
- Resource ownership: Roles that define permissions for managing specific resources
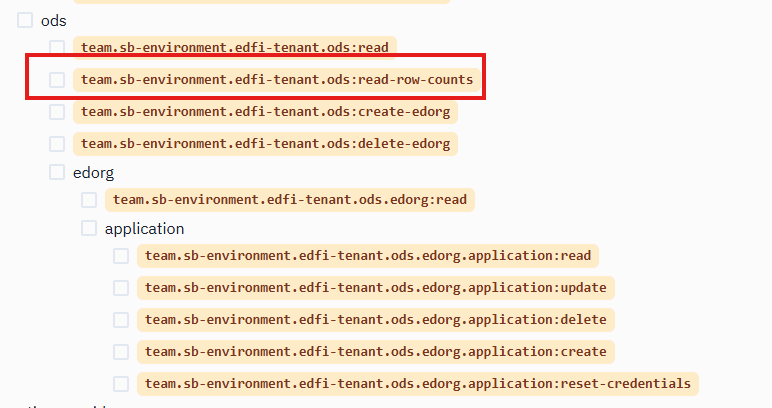
Do NOT enable the "row-count" permission (team.sb-environment.edfi-tenant.ods:read-row-counts).
This permission enables the "row count" button on the ODS page, but this feature is not yet functional in this release of Admin App. Enabling it will cause errors.
Ownerships
Ownerships define which teams have access to specific resources in the system. Managing ownerships is crucial for proper access control and delegation of responsibilities.
You will not be able to configure ownerships until an environment is created (see Step 1). If you are blocked by AWS dependencies, resolve those first.
Managing Resource Ownership
- Select the resource type (Environment, Tenant, Application, etc.)
- Select the specific resource (it may be pre-selected depending on context)
- Choose the team that should have ownership
- Select the appropriate role that defines permission level
- Click "Save"
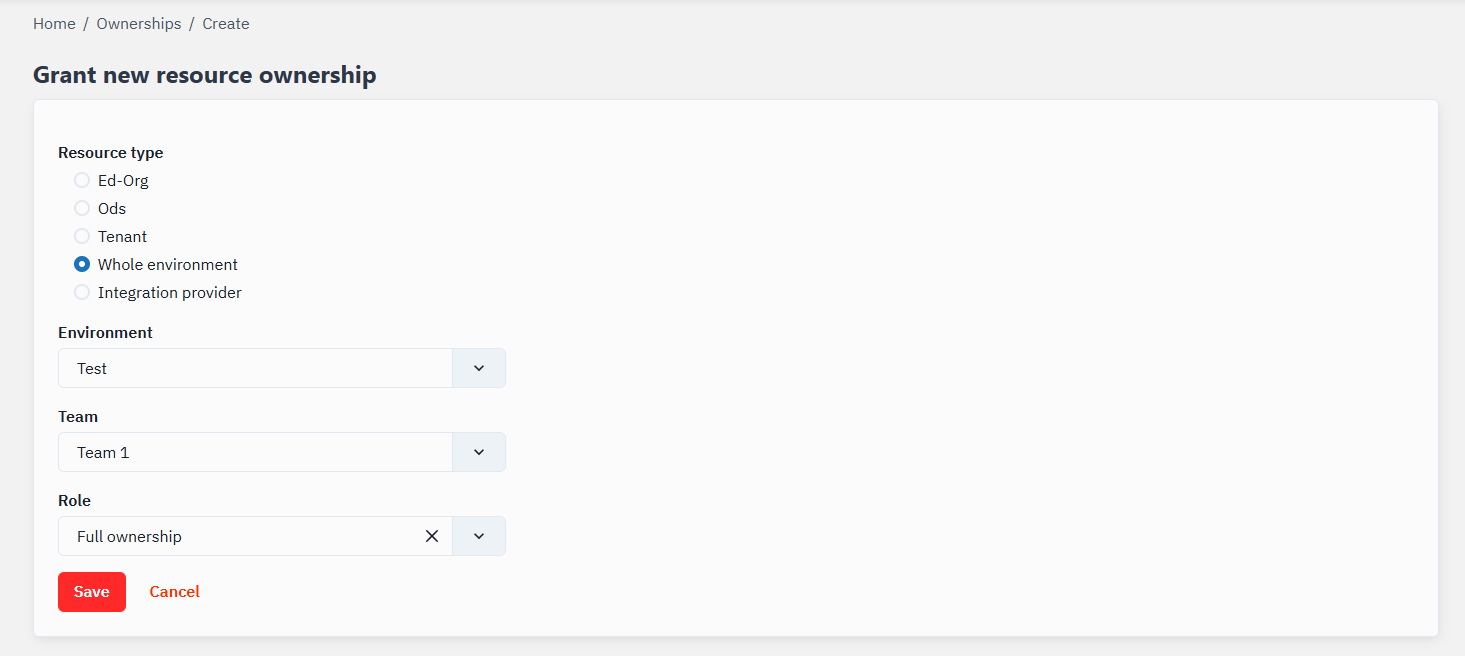
Types of Resources That Can Be Owned
- Whole environment: Grant teams access to manage entire environments
- Tenant: Allow teams to manage specific tenants within an environment
- Ods: Define which teams can access specific ODS instances
- Ed-Org: Grant teams access to manage educational organizations
- Integration provider: Allow teams to manage integration providers
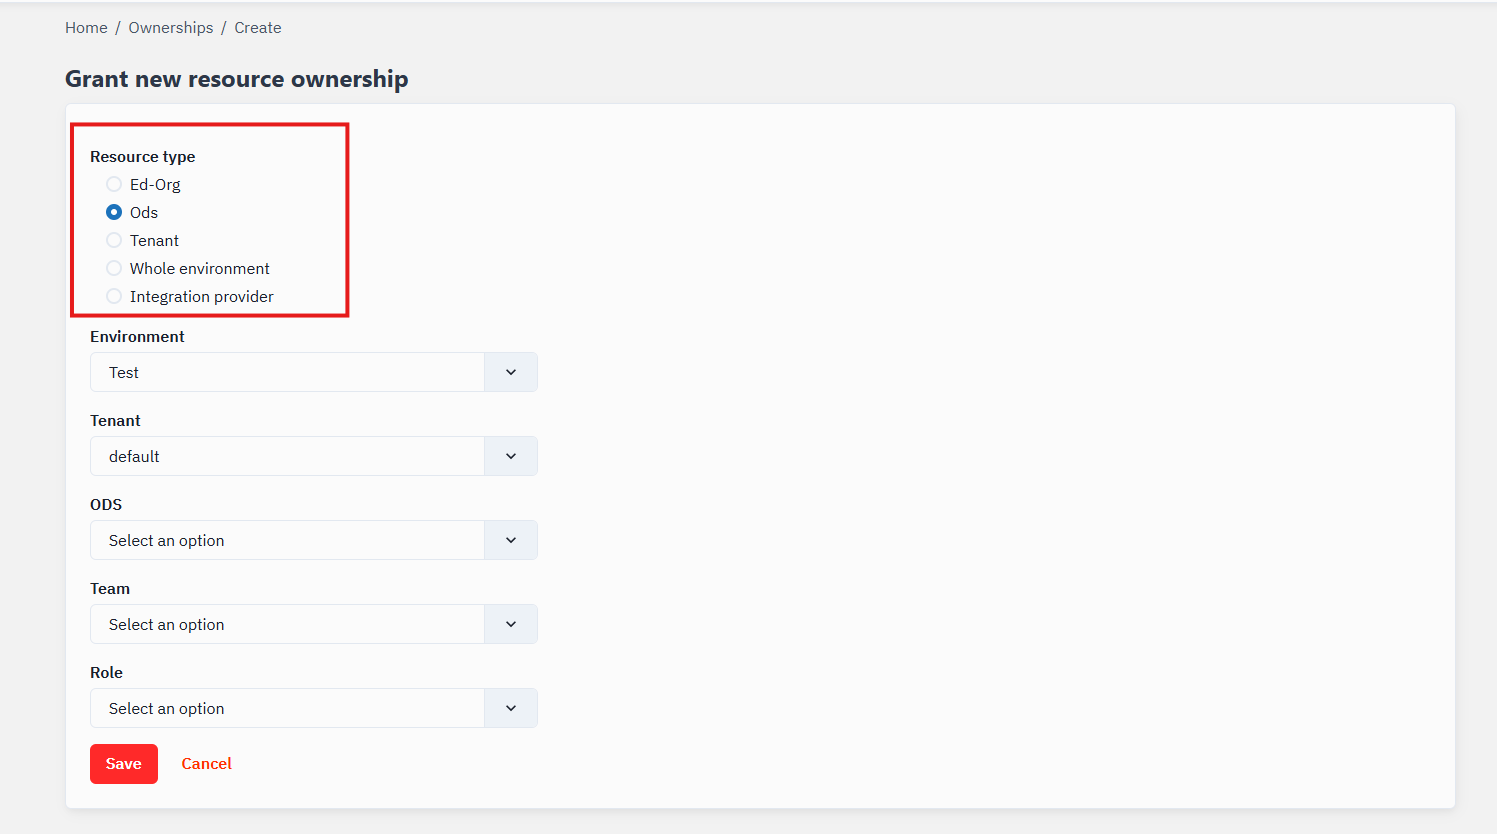
The ownership form is dynamic and adapts to your resource type selection. When you choose a specific resource type, the form will update to display only the relevant resources available for that category, streamlining the ownership assignment process.
Removing Ownerships
If you need to revoke access:
- Navigate to Global > Ownerships in the main navigation menu
- Locate the ownership you want to remove
- Click the delete (trash) icon
- Confirm the deletion when prompted
Creating Applications (Admin API v2 Mode)
To create applications in Admin API v2 mode, you must first populate the ODS instance information in the database manually. This is a prerequisite before you can register any applications.
Required Manual Database Configuration
- Connect to your database using your preferred SQL client
- Execute the following SQL to insert ODS instance records:
INSERT INTO dbo.odsinstances ("name", instancetype, connectionstring)
VALUES
  ('EdFi_Ods_2026', '2026 ODS', 'host=SERVER_1;port=5432;username=postgres;password=CHANGEME;database=EdFi_Ods_2026'),
  ('EdFi_Ods_2027', '2027 ODS', 'host=SERVER_2;port=5432;username=postgres;password=CHANGEME;database=EdFi_Ods_2027');

INSERT INTO dbo.odsinstancecontexts (odsinstance_odsinstanceid, contextkey, contextvalue)
SELECT odsinstanceid, 'schoolYearFromRoute', '2026' FROM dbo.odsinstances WHERE "name" = 'EdFi_Ods_2026'
UNION
SELECT odsinstanceid, 'schoolYearFromRoute', '2027' FROM dbo.odsinstances WHERE "name" = 'EdFi_Ods_2027';
See Context-Based Routing for Year-Specific ODS for more information on this multi-instance feature.
- Replace
SERVER_1,SERVER_2, andCHANGEMEwith your actual server names and credentials - After inserting these records, you must restart the ODS/API application container for the changes to take effect
- This manual step will be automated in a future release