Getting Started - Source Code Installation
This section describes how to set up the Ed-Fi ODS / API v5.4 source code on a development machine. For those interested in getting an Ed-Fi ODS / API instance up and running quickly, but do not have developer tools or experience, we recommend you consult Getting Started - Binary Installation.
Details on each step follows
Step 1. Install and Configure Windows Components
Ensure that the following components are installed:
- PowerShell 5.0. PowerShell is used to initialize the development environment.
- .NET 8.0 SDK. The .NET 8.0 Software Developer Kit is required for compiling the solution.
View detail...
PowerShell 5.0
Verify that PowerShell 5.0 or above is installed:
- Press the Windows key
on your keyboard, type PowerShell, select Windows PowerShell, and press Enter.
- Type
$PSVersionTable.PSVersion, and press Enter. - If the required version is not installed, download Windows Management Framework 5.0, which includes PowerShell 5.0.

.NET 8.0 SDK
Download and install the latest NET SDK 8.0 (Compatible with Visual Studio 2022).

Step 2. Install and Configure Required Software
Ensure that the following software is installed and configured:
- Visual Studio 2022 (Community, Professional, or Enterprise edition) or JetBrains Rider version 2021.3+ (an alternative development environment that can be used instead of Visual Studio 2022).
- Microsoft SQL Server 2019. Microsoft SQL Server is used to store the data for the Ed-Fi ODS / API. Local installation of Standard, Developer, or Enterprise Editions are supported.
- Optional PostgreSQL datastore:
- PostgreSQL 11.x. PostgreSQL can be used as the datastore for an Ed-Fi ODS / API instance instead of Microsoft SQL Server.
View detail...
Microsoft SQL Server 2019
Install Microsoft SQL Server 2019:

- When prompted, select the following features:

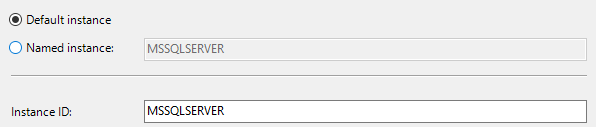
- Use the default instance named MSSQLSERVER.
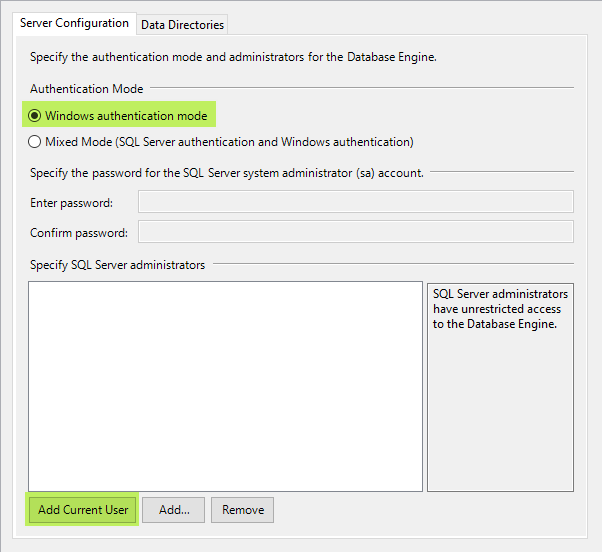
- Select either Windows Authentication Mode or Mixed Mode.
- In Specify SQL Server administrator, click Add Current User.
Install SQL Server Management Studio:

Visual Studio 2022
Visual Studio 2022 (Community edition or higher) is required for a development environment.
Installing Visual Studio 2022
The instructions below are based on the Visual Studio 2022 Community Installer.
-
Launch the installer and make sure the following features are selected:
- In the Workloads Tab
- .NET Desktop development, and select the following components:
- ASP.NET and web development
- In the Workloads Tab
-
Restart your computer (if prompted)
-
Open Developer Command Prompt for VS2022 as an Administrator, at the command prompt type gacutil -l envdte to verify EnvDTE is registered in GAC. If no listings are found, run the following command to add EnvDTE to GAC.
gacutil -i "%COMMONPROGRAMFILES(x86)%\microsoft shared\MSEnv\PublicAssemblies\envdte.dll"
After installing, check the Visual Studio Start Page and Windows Update for Visual Studio updates.

PostgreSQL Installation (Optional)
PostgreSQL Visualization Tool
Unlike SQL Server, PostgreSQL does not include a GUI to visualize the database (commands are executed via the command line using psql). Below is a list of various tools that work:
Install PostgreSQL
Installation of PostgreSQL can be done either using the binaries or using Docker. The recommended solution is to to use the docker install using Linux containers.
Option 1.Installation using PostgreSQL Installer
Installation using PostgreSQL Installer
- Install using the PostgreSQL installer. Version 11.x is compatible with the ODS / API.
- Note the installer includes pgAdmin as an option.
- The PostgreSQL installation guide has details.

Download the version 13.x installer.

Click Next.

Click Next.

If you want to install only the tools uncheck PostgreSQL Server, pgAdmin 4 and Stack Builder.
Click Next.

Click Next.

Enter a password for the postgres superuser.
Click Next.

Enter port 5432 (default).
Click Next.

Click Next.

Click Next.

Click Next to finish the installation.
Option 2. PostgreSQL Installation with Docker
Installation with Docker
- Install Docker using this guide.
- Create a Docker Compose file.
Run PostgreSQL with Docker in Linux Containers
Create a Docker Compose file (name: docker-compose.yml) to bootstrap PostgreSQL using Linux containers. More information on the Docker Compose file can be found on the Docker documentation site.
version: '3.7'
services:
  pg11:
    image: postgres:11-alpine
    container_name: pg11
    volumes:
      - pg11-database:/var/lib/postgresql/data
    ports:
      - 5432:5432
    environment:
      - POSTGRES_PASSWORD=${PG_PASSWORD}
    restart: on-failure
volumes:
  pg11-database:
    driver: local
    name: pg11-database
Create an environment file (name: .env) to be consumed by Docker Compose. By default the environment file needs to be in the same folder as the Docker Compose file.
PG_PASSWORD=P@ssw0rd
Sample files for these can be downloaded from the download panel on the right.
Once you have set up your docker-compose.yml and .env files and placed them in a folder (e.g., C:\PGDockerSetup), navigate to that folder in PowerShell and run docker-compose. This utility reads the docker-compose.yml configuration file and runs all of the containers described in that file.
To bring up the environment:
C:\PGDockerSetup>docker-compose up -d
To stop the volumes and containers:
C:\PGDockerSetup>docker-compose down
To stop the services and remove them, but retain the data in separate volumes:
C:\PGDockerSetup>docker-compose down -v
Configure pgpass.conf
Create a pgpass.conf file. Note that the password should be your postgres superuser password and it should match the password in your environment file.
localhost:5432:*:postgres:P@ssw0rd
Set the environment variable PGPASSFILE to the location of the pgpass file that was created, which is the recommended approach. Optionally, the file can be saved in %APPDATA%/postgresql/pgpass.conf.

You can test the environment variable setup using:
C:\> get-item env:pgpassfile

| Name       | Value                        |
|------------|------------------------------|
| PGPASSFILE | C:\PGDockerSetup\pgpass.conf |
Step 3. Download the Ed-Fi ODS / API v5.4 Code
The Ed-Fi ODS / API source code is contained in two Ed-Fi repositories hosted by GitHub.
Source Code Links
Use a Git client (such as GitHub Desktop) or a Git command line tool to Git Clone each of the repository links described above. It is important that both repositories are extracted to the same root directory (for example C:). When both repositories have been cloned, there will be two folders for the ODS / API source code as shown below:

When you clone a repository, ensure that you have the correct tag checked out in your client before you proceed.
git checkout tags/v5.4-patch1 -b <branch>
If you download the code via a ZIP file, ensure that you check Unblock in the file's Properties dialog to allow the contents of the contained scripts to execute properly.

View detail and options...
Accessing Daily Source
The links above are for the stable release of the ODS / API v5.4. You can download the links to the very latest daily source code in the development branch:
Alternate Method for Code Download
Some developers prefer simply to download the code rather than perform a Git Clone. You can do so by following these instructions:
-
Navigate to each of the repository links described above (for latest release or daily source) and use the Download ZIP button to download the repository to your local drive.

-
In Windows Explorer, right-click on each of the downloaded ZIP files and select Extract All… Enter C:\ for the target folder. (You can extract the files to any directory, but these instructions assume you've extracted to C:.) The ZIP files contain an embedded folder ending in "-v5.4-patch1" (or "-main" if downloading latest daily source). For example, the "Ed-Fi ODS ZIP" archive contents will be extracted into C:\Ed-Fi-ODS-v5.4-patch1.
-
After the extractions are complete, rename the folders to remove the -v5.4-patch1 (or "-main") from the folder names. For example, change C:\Ed-Fi-ODS-v5.4-patch1 to C:\Ed-Fi-ODS.
-
When the extraction and renaming are complete, there should be two folders for the ODS / API source code as shown below:
Troubleshooting the File Extract
If you get a warning or error when attempting to extract the downloaded ZIP files, right-click each of the downloaded ZIP files and select Properties. On the General tab, check Unblock to allow the contents of the contained scripts to execute properly.

Step 4. Prepare the Development Environment
To prepare the development environment, you'll need to follow the procedures described below.
Verify PowerShell Script Permissions
When opening PowerShell, ensure that Run as Administrator is selected. You may need to change the execution policy for unsigned PowerShell scripts to run on your machine to run the scripts. This can be done by opening a PowerShell console and typing the following command:
Set-ExecutionPolicy Unrestricted
Initialize PowerShell Scripts for Development
There are several databases that must be successfully deployed. PowerShell scripts that initialize all necessary development databases are included in the Visual Studio solution. These scripts are enabled for use within Visual Studio when the Ed-Fi-ODS solution is opened. They may also be loaded for use within a PowerShell console window by running the initialize PowerShell for development script located at:
C:\Ed-Fi-ODS-Implementation\Initialize-PowershellForDevelopment.ps1
When the scripts are loaded, you should see the results shown below:

Initialize the Development Environment
Once the PowerShell scripts for development have been loaded and a development certificate has been installed, the development environment may be initialized by navigating to the Ed-Fi-ODS-Implementation folder.
For a SQL Server backing datastore, type the following into a PowerShell command prompt:
initdev
For a PostgreSQL backing datastore, use the following:
initdev -Engine PostgreSQL

A successful initdev execution will display the tasks executed and their duration as shown below:

Step 5. Build the Visual Studio Solution
To build the solution from within Visual Studio:
- Start Visual Studio. Within Visual Studio, open the "Ed-Fi-Ods.sln" solution file from the C:\Ed-Fi-ODS-Implementation\Application directory.
- Select Build > Build Solution (or press Ctrl+Shift+B).
View detail and options...
Code Generation During Build
The following diagram shows how MeatEd generated artifacts are used to create the API for the Ed-Fi ODS using code generators within the solution. Code generation uses Api Model JSON file to understand the structure that it uses to generate data access code. Code generation also depends on the DatabaseViews.generated.json which is generated one time using the "EdFi_Ods_Empty" database and subsequently provided by the source code repository.

Alternatively Building from the Developer Command Prompt
When the “EdFi_Ods_Empty” database has been created (by running the initdev PowerShell command in the previous step), there are two ways to build the solution. The solution can be built from Visual Studio, as described above, or from a Developer Command Prompt for Visual Studio using the Windows start menu.
To do a clean build from the command prompt:
-
Open the Developer Command Prompt for Visual Studio.

-
Navigate to your C:\Ed-Fi-ODS-Implementation\Application directory.
-
Issue a command similar to the following:
Msbuild /nr:false /t:clean;build Ed-Fi-Ods.sln
Step 6. Set Startup Projects
The Visual Studio Solution for the Ed-Fi ODS / API consists of several "Startup Projects" that work together. Each of these projects needs to be running for the system to be fully functional.
To set the Startup Projects:
-
Select the Set StartUp Projects… context menu by right-clicking on the solution file in the Solution Explorer.

-
Within the Startup Project property page, select the Multiple startup projects radio button and enable the following projects:
- EdFi.Ods.SandboxAdmin
- EdFi.Ods.SwaggerUI
- EdFi.Ods.WebApi

-
Click OK to accept the changes to your local development settings.
Step 7. Run the Solution
Running the solution
- To run the Ed-Fi ODS / API without debugging, press Ctrl+F5.
- To interactively debug the Ed-Fi ODS / API solution, press F5 (or press Start in the Standard Toolbar).

Notes on Running the Solution
- The solution builds and starts each of the projects that were added to the startup projects list. Each web application starts an instance of IIS Express. By default, the websites are configured according to the following table:
| Website | Project | URL |
|---|---|---|
| Ed-Fi ODS API | EdFi.Ods.WebApi | http://localhost:54746/ |
| Sandbox Administration | EdFi.Ods.SandboxAdmin | http://localhost:38928/ |
| Ed-Fi ODS API Documentation | EdFi.Ods.SwaggerUI | http://localhost:56641/ |
- At this point, you're ready to explore the system.
View detail about the applications...
Follow these steps to finish configuring the solution:
- Visiting the API Sandbox Administration Portal and logging in with the Test User Account
- Reviewing the Ed-Fi ODS API Documentation
The Sandbox Administration Portal
The Sandbox Administration Portal is a web application used to create sandbox databases containing data that can be accessed through the Ed-Fi ODS / API.
Login to Sandbox Administration Portal with Test Admin Account. Login details can be found in Ed-Fi-ODS-Implementation\Application\EdFi.Ods.SandboxAdmin\appsettings.json or alternatively in appsettings.Development.json file. We recommend that you change your password as soon as you log in.

As the name implies, Sandbox Administration Portal is useful for development machines and sandbox instances of the ODS / API, but should not be present on production instances. See the Platform Developers' Guide - Deployment section for details.
The Ed-Fi ODS / API Documentation Web Page
The ODS / API Documentation Web Page provides an overview of the ODS / API, and links to more detailed API documentation.

The REST interface to the Ed-Fi ODS / API exposes metadata describing the exposed resources as well as the inputs, HTTP verbs, and schema of the exposed entities. This metadata enables a user interface (based on the Swagger framework) to display API documentation.
The Swagger-based documentation web page uses a key and secret (typically the same one used for the Sandbox Administration Portal) to access the data that has been placed in the corresponding sandbox.
To view the data in your sandbox, click Authorize and enter the key and secret in the appropriate fields and retrieve a token (the key and secret values for the default sandbox are pre-populated). This token is used throughout your session to access your sandbox. This is the same process used by other applications to access their data.

Similar to the Sandbox Administration Portal, the ODS / API Documentation Web Page is useful for development machines and sandbox instances of the ODS / API, but is generally not present on production instances. See the Platform Developers' Guide - Deployment section for details.